This is a guest post by Samir Talwar, a software developer based in London. Samir cares deeply about software quality and craftsmanship. You can read more of his writing on his excellent blog and follow him on Twitter.
In my last tutorial, we figured out how to host static web pages for free on GitHub pages. However, if you tried to host images or other large assets in the same fashion, you may have noticed that it's pretty slow. GitHub Pages was never designed to handle large files. In this article, we'll explore a much faster, yet extremely cost-effective solution for dealing with non-text data.
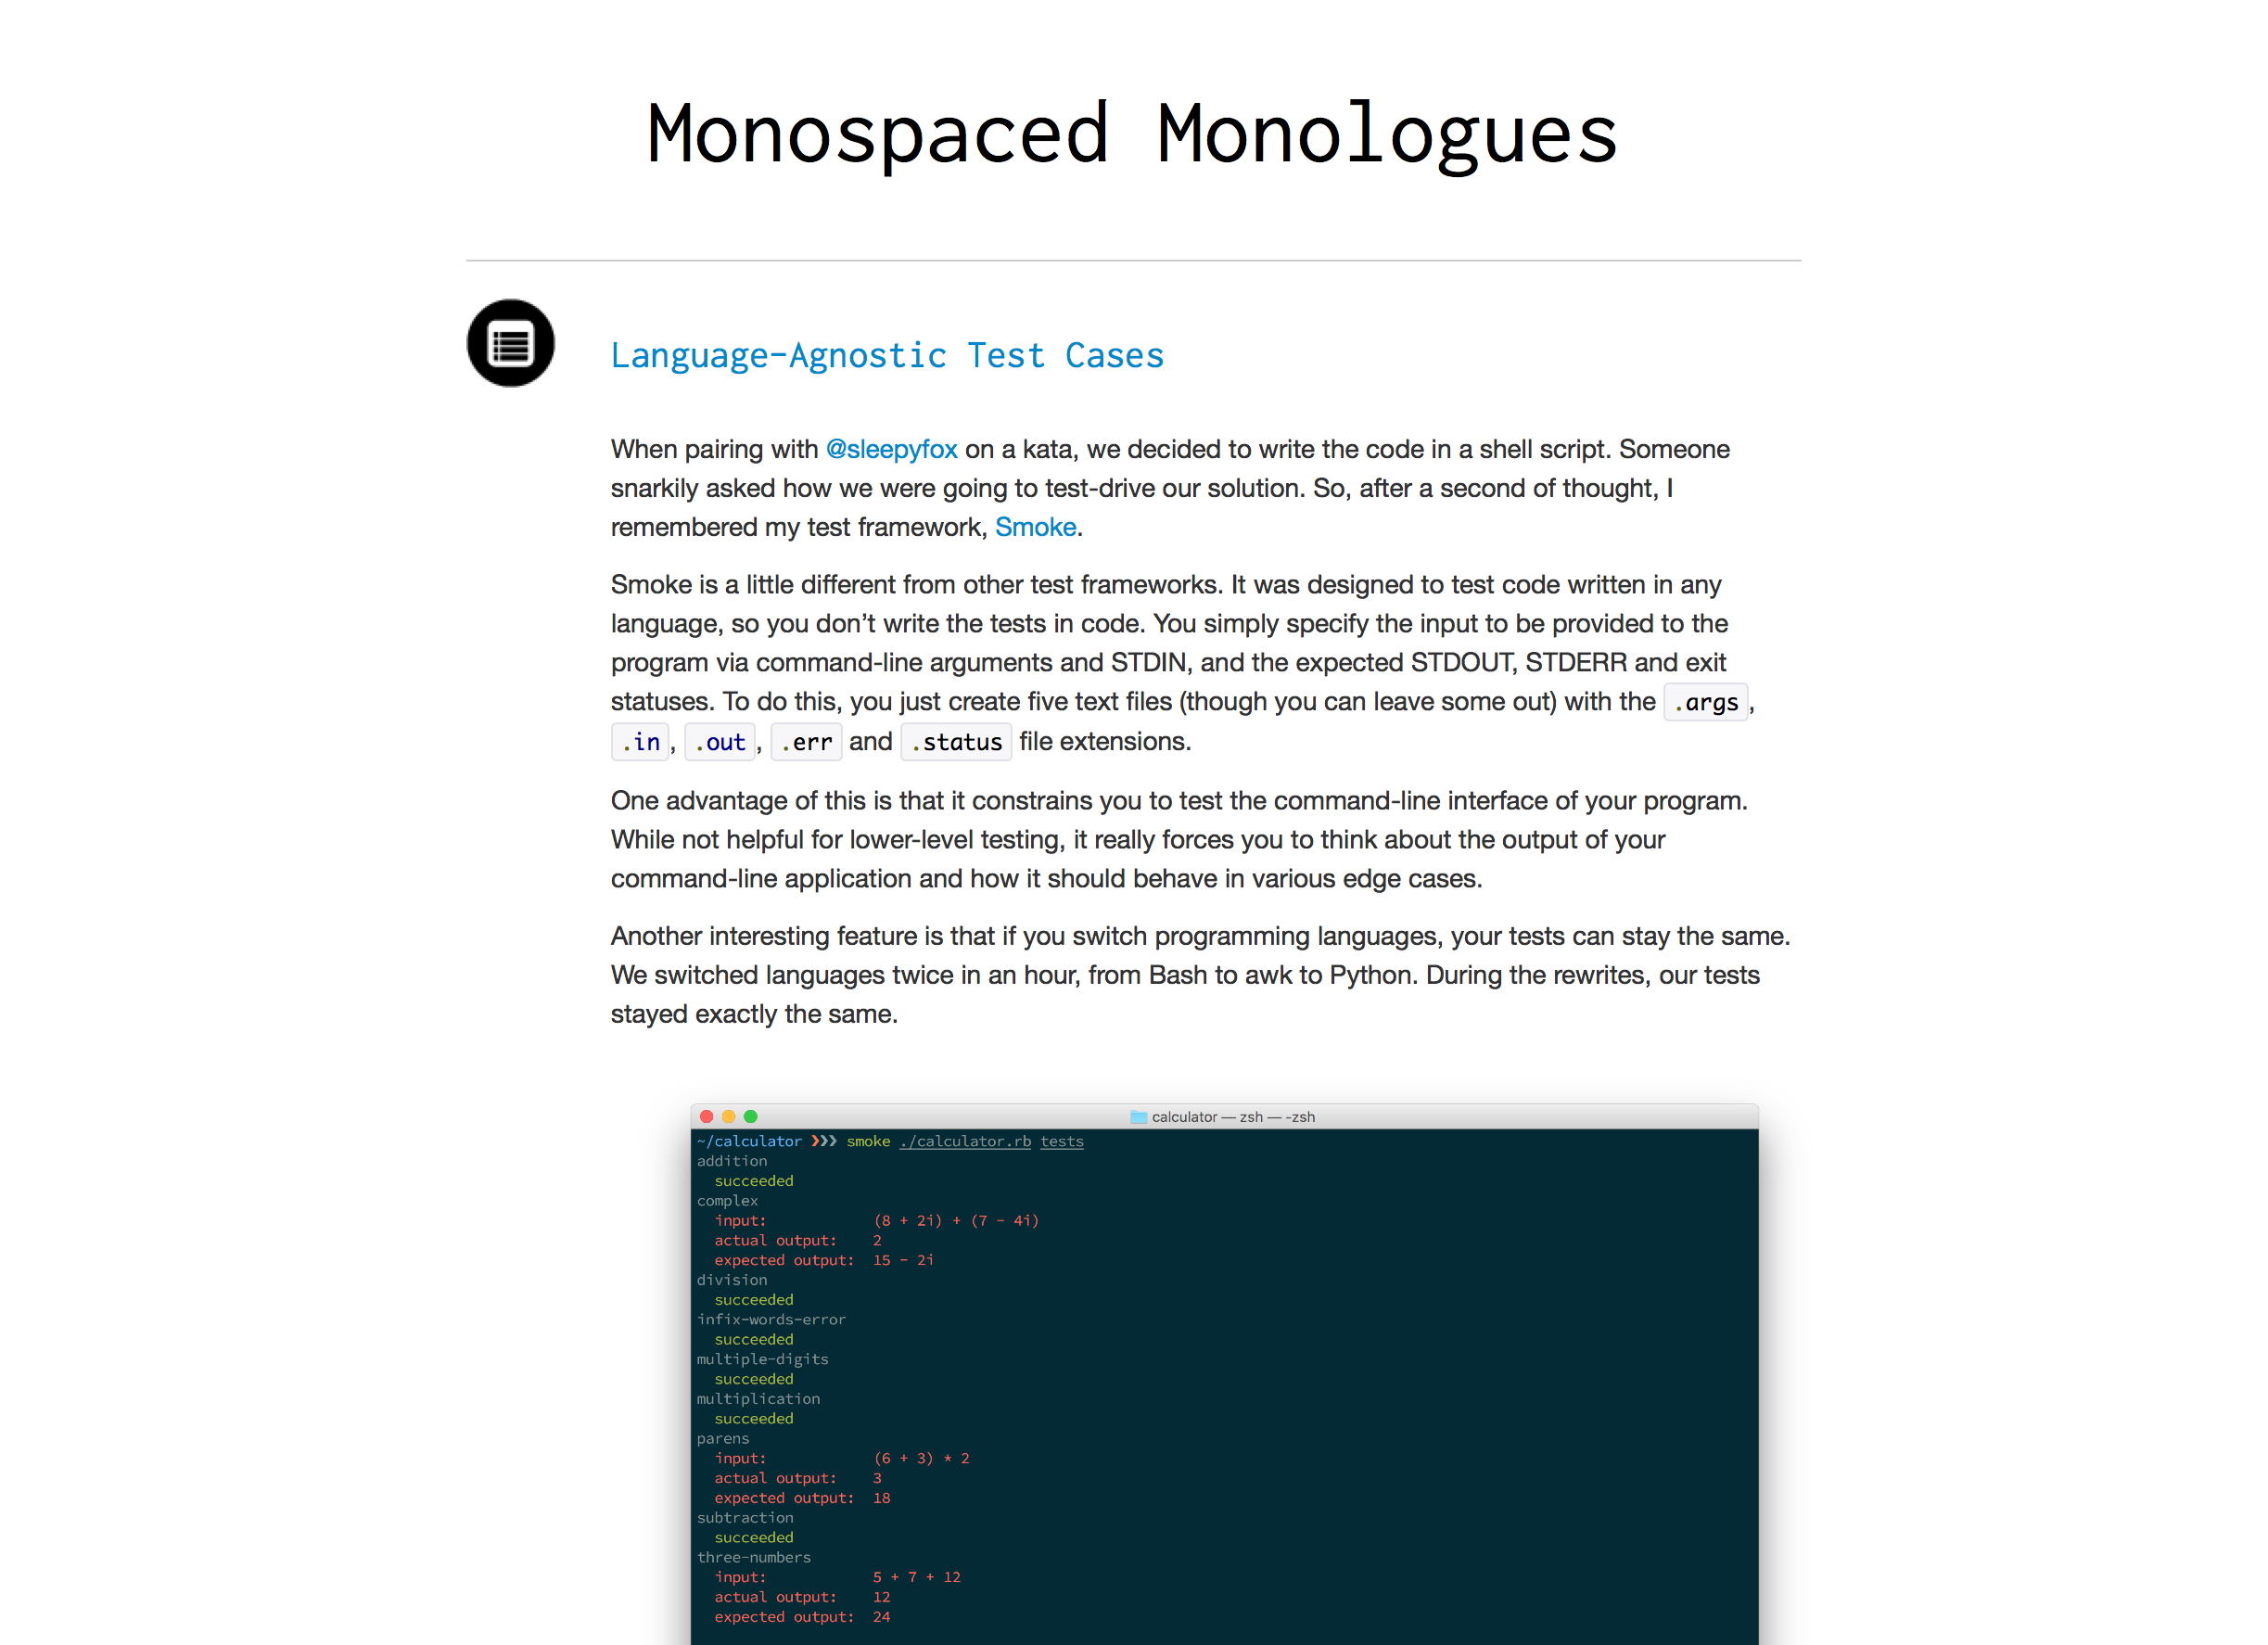
My blog, monospacedmonologues.com, is pretty text-heavy, but gets a sprinkling of pictures once in a while. The blog itself is really just a Tumblr blog, and so I don't host it anywhere I can store files. But that doesn't matter, because the images can be hosted anywhere.
Personally, I use Amazon Web Services to host my images, but there are lots of other storage providers, such as Rackspace Cloud, Google Cloud and Microsoft Azure. The important thing is to pick one that isn't going away any time soon, so I'd suggest sticking to the big players.
If you want to follow along, you'll first need an Amazon Web Services account. The process is pretty similar for all of the above cloud providers though.
Buckets of assets
Amazon, along with a few of the other cloud providers, use the term "bucket" to refer to a lot of related files. You can pretty much consider it a folder that belongs to you.
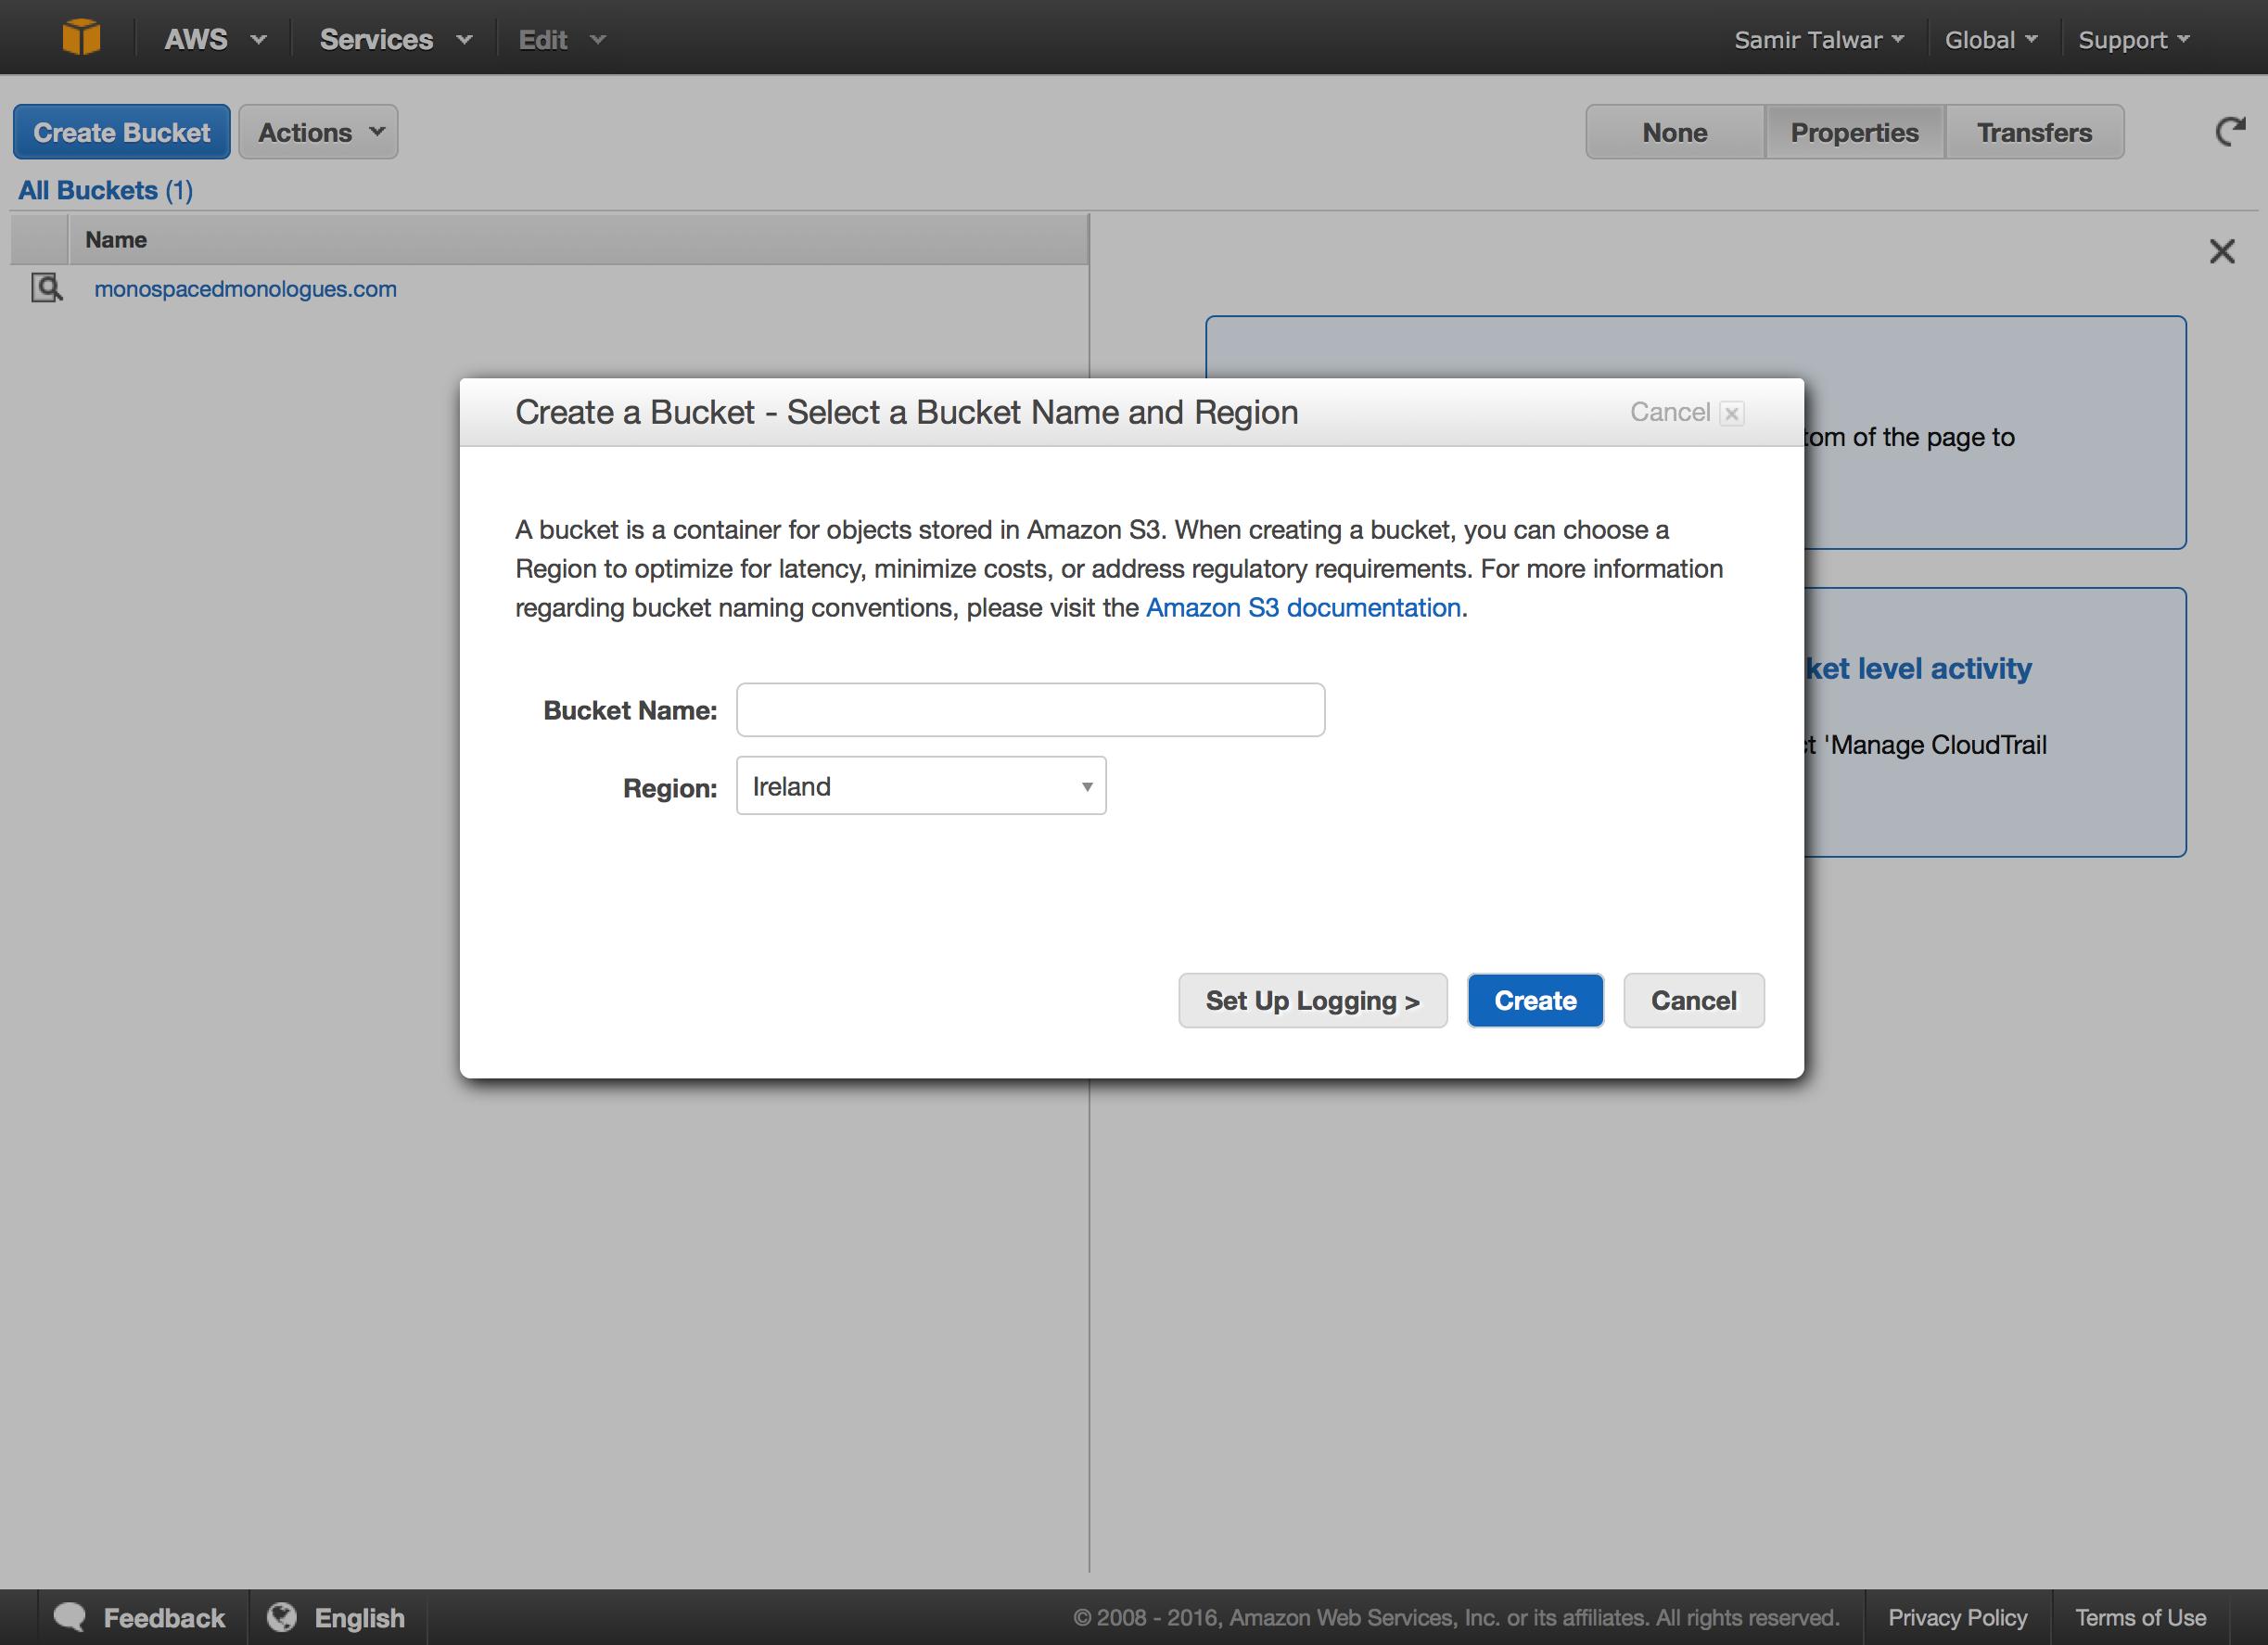
Once we're on the S3 home page, create your bucket. If you have a domain name already, I'd recommend naming it the same as your domain — it'll stop you getting confused later if you end up with multiple buckets for multiple purposes. I named mine "monospacedmonologues.com". Your bucket name needs to be globally unique, so if you don't own a domain name, you may have to be fairly inventive.
As for the location, I picked the one closest to me. If your friends/readers/customers are all in one spot, then you could pick the location closest to them. Don't fret about it too much though. We're going to distribute our files all over the world soon.
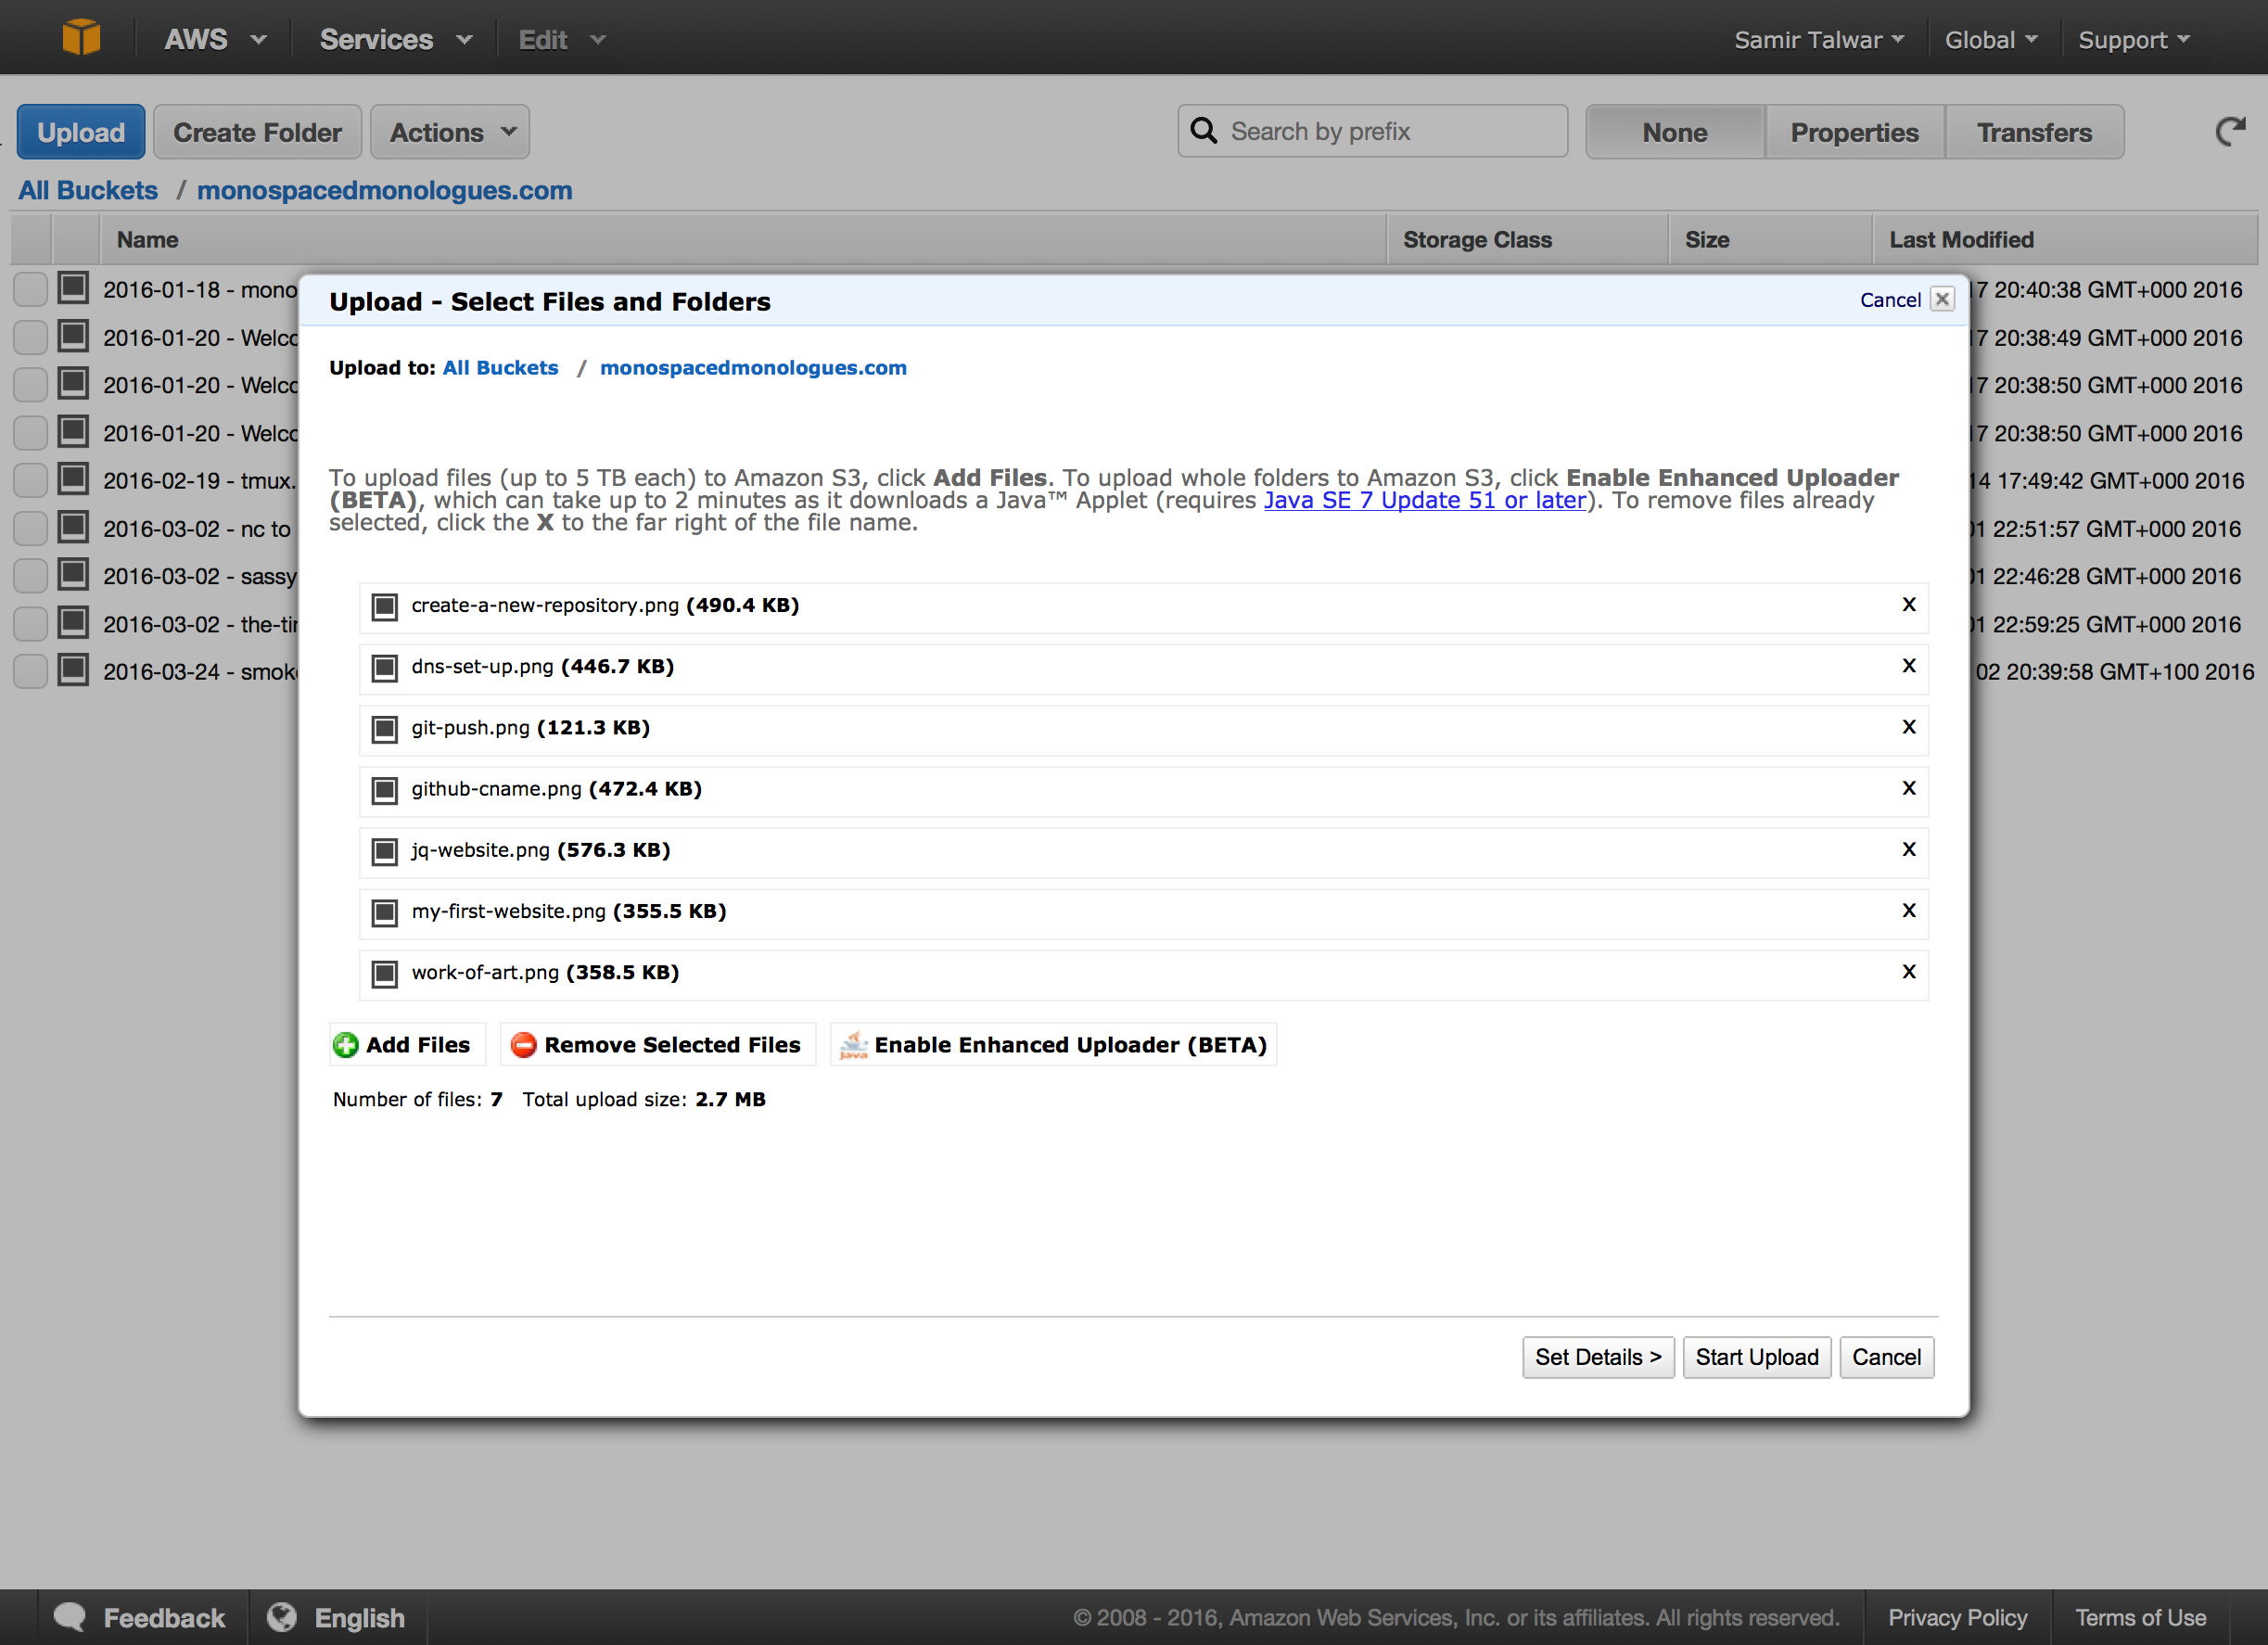
Once you have a bucket, you can upload files. Click the big blue Upload button, then Add Files, and select the files you want to upload. You can rename them later in the S3 interface if you need.
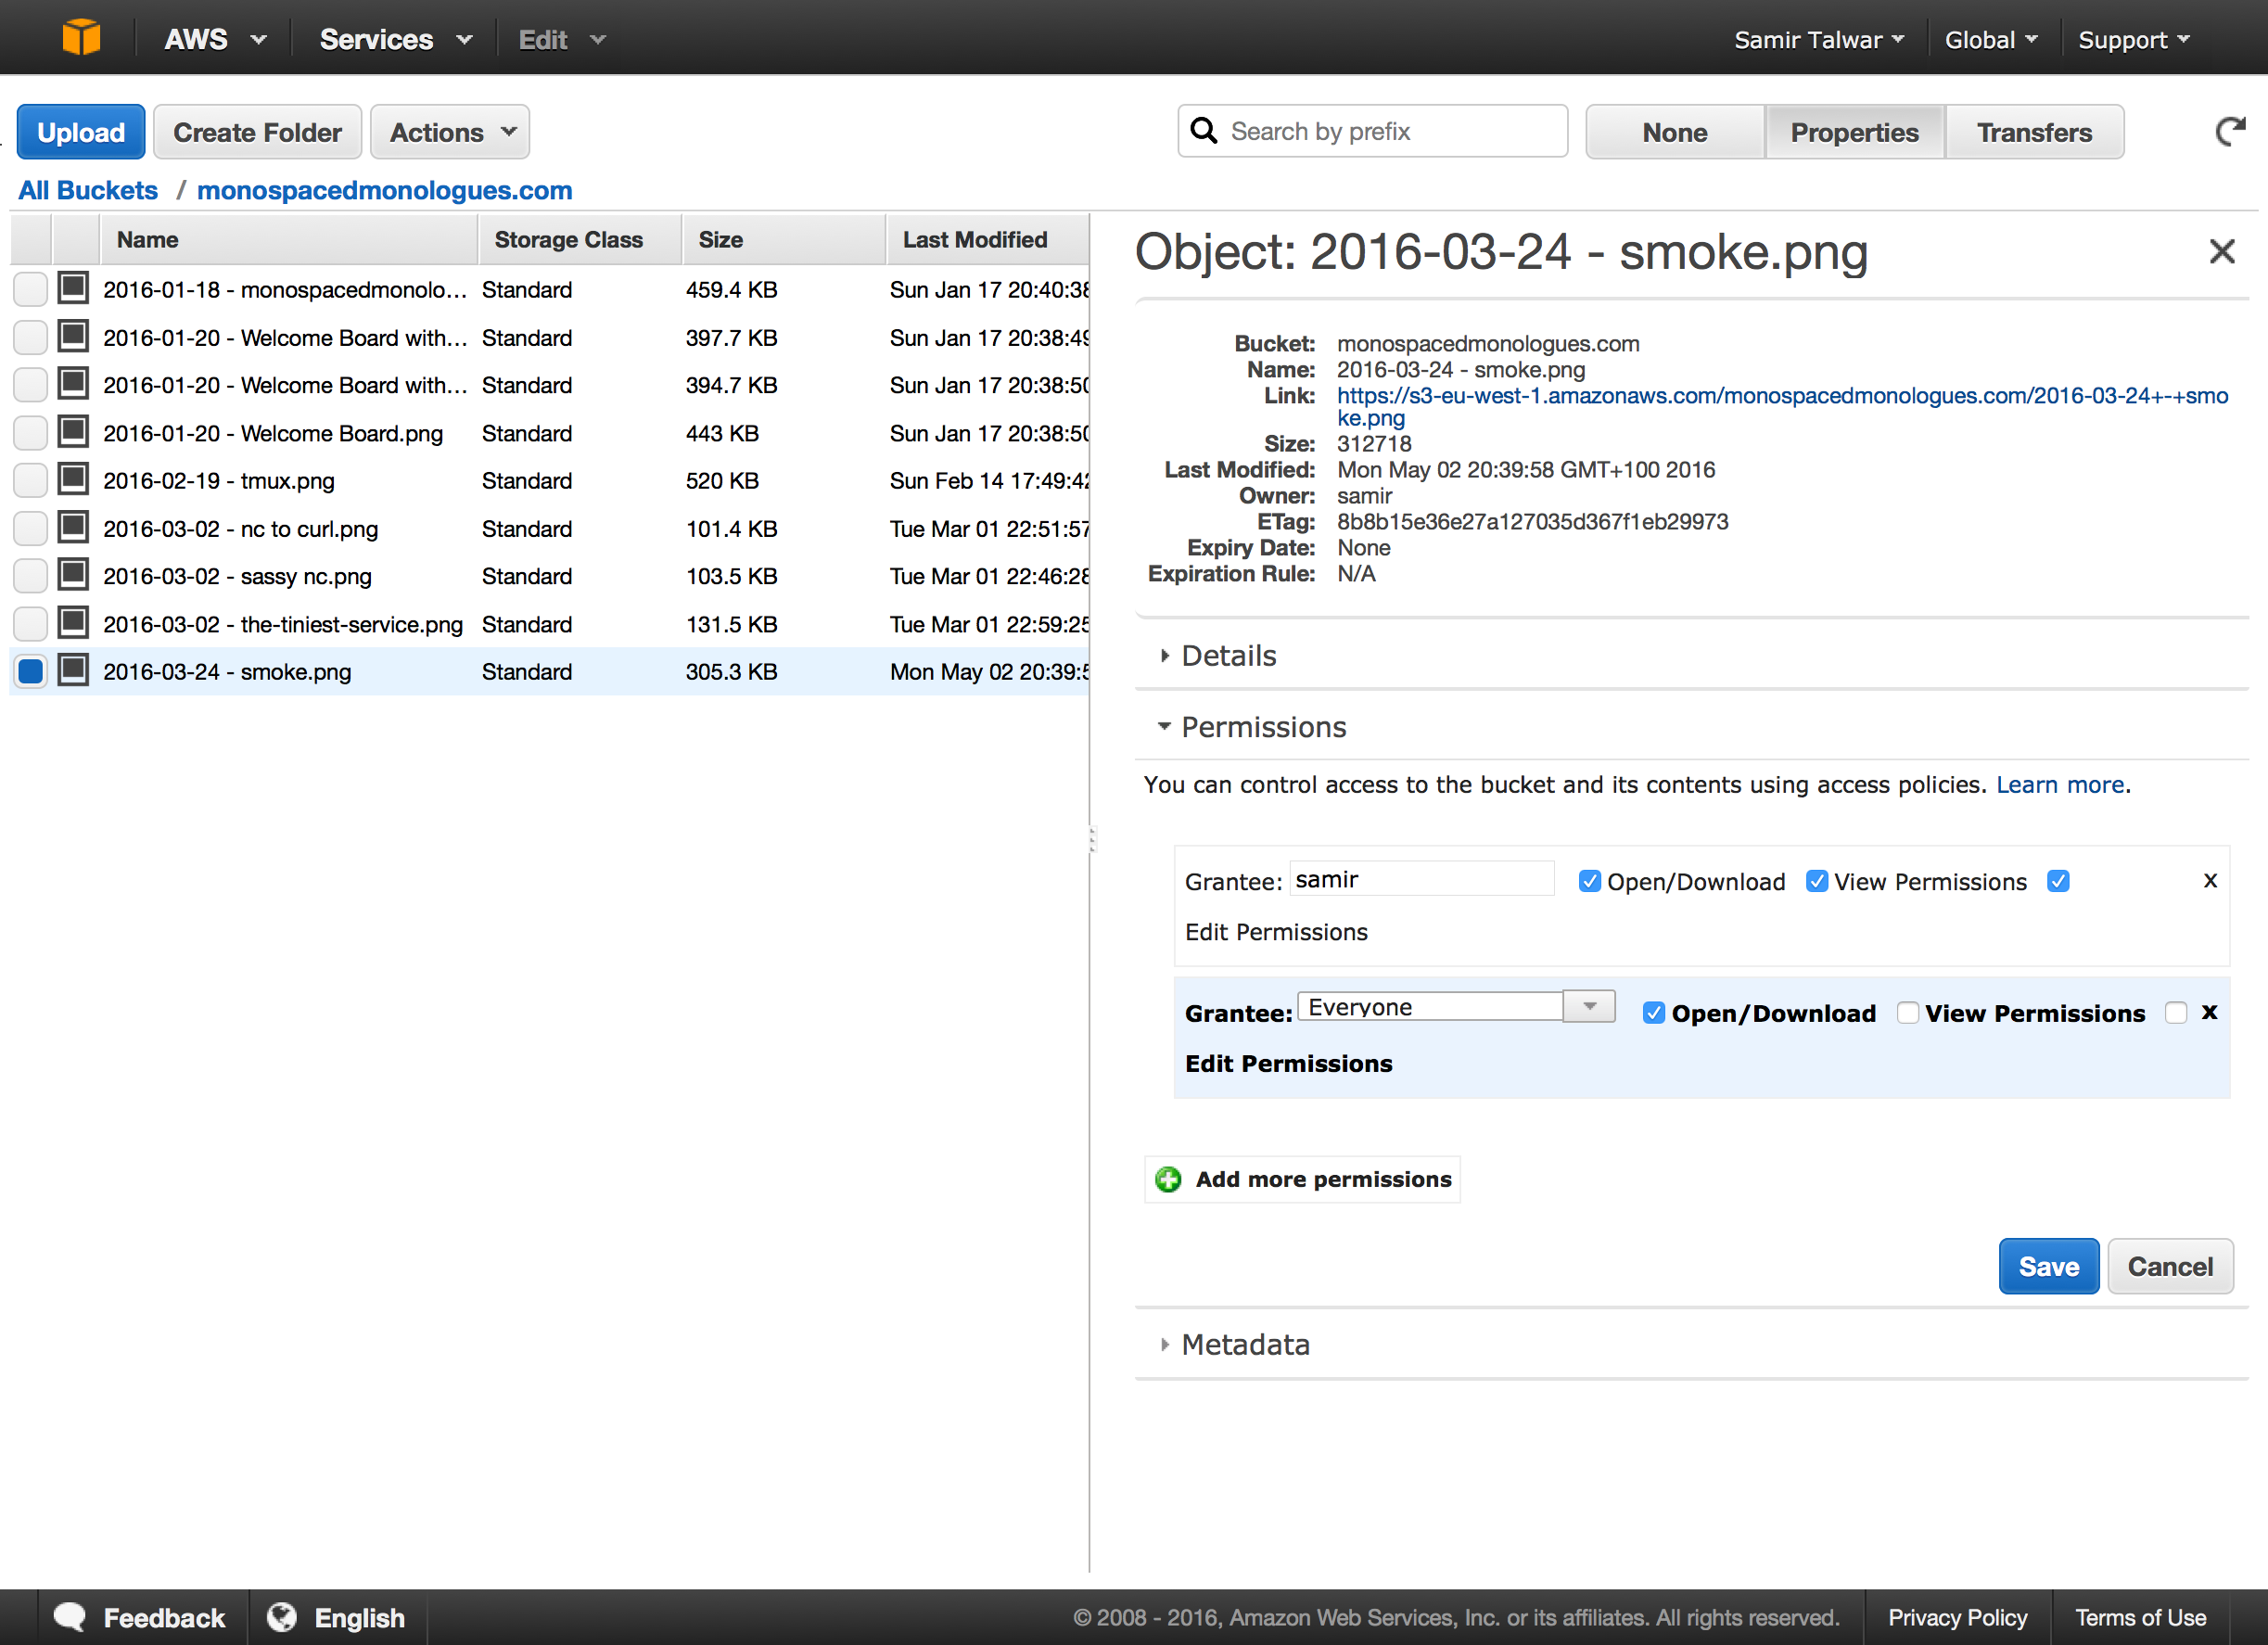
Once they're up on Amazon's servers, select one of your newly-uploaded files and click Properties in the top-right. You'll see a link to the file. The structure looks something like this:
You can also access your assets through a nicer-looking link that has this structure:
https://<bucket>.s3.amazonaws.com/<file>
They're basically the same thing, but having a domain name specific to your bucket has a bunch of advantages we'll see later.
For now, open it up using whichever URL you like. Either way, you'll see an "Access Denied" message. This is because S3 files are private by default, as many people use it to store sensitive data. In order to host your website files there, you'll need to change the permissions of the files so they can be accessed by the outside world.
To do so, first select a file and click Properties on the top right. then open the Permissions section and add an item. We're going to grant "Everyone" the right to Open/Download the file.
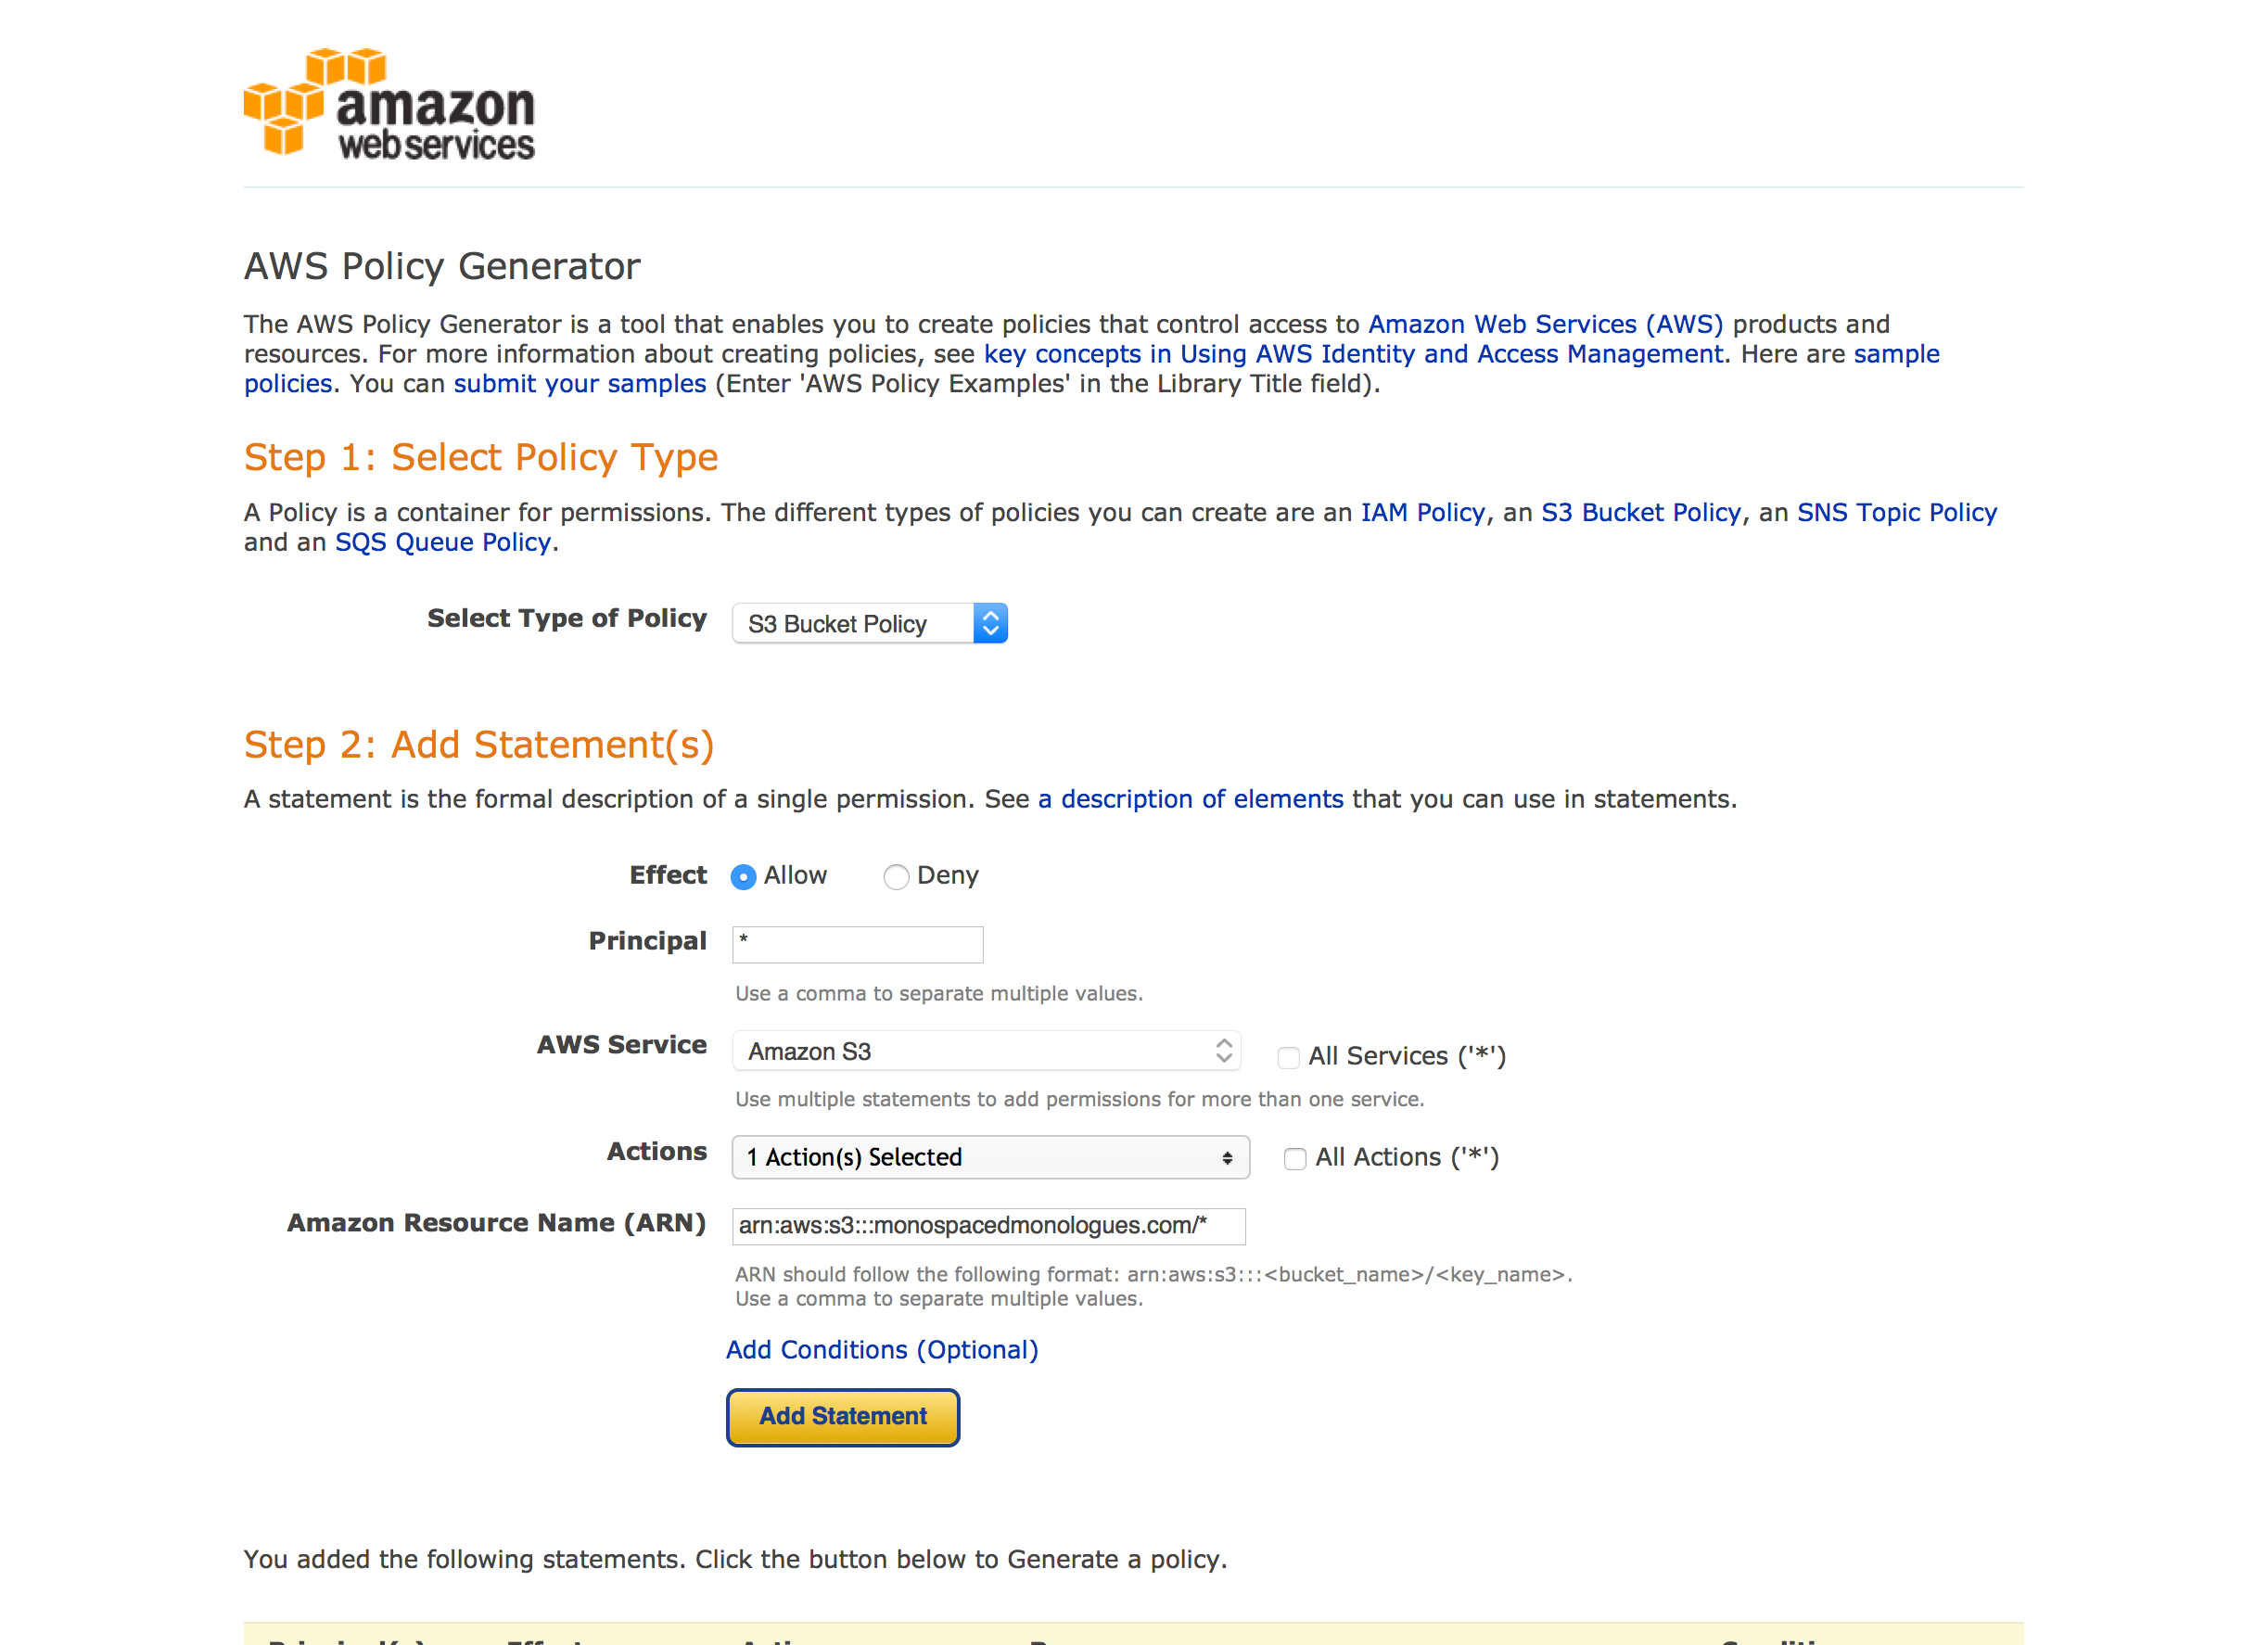
Of course, this could get tedious if we have more than a few files. An alternative is to specify a policy for the bucket. These are quite complicated, but we can do it by using the AWS Policy Generator.
First of all, select "S3 Bucket Policy" as the type of policy. It'll then prompt you for a few pieces of information.
The Principal is the user who will be accessing the object. As we want everyone to access it, enter *.
As for Actions, we would like everyone to be able to execute the GetObject action and nothing else.
Just like the example below, the Amazon Resource Name should be something like:
arn:aws:s3:::<bucket_name>/*
Our key name is * because we want people to access everything in this bucket.
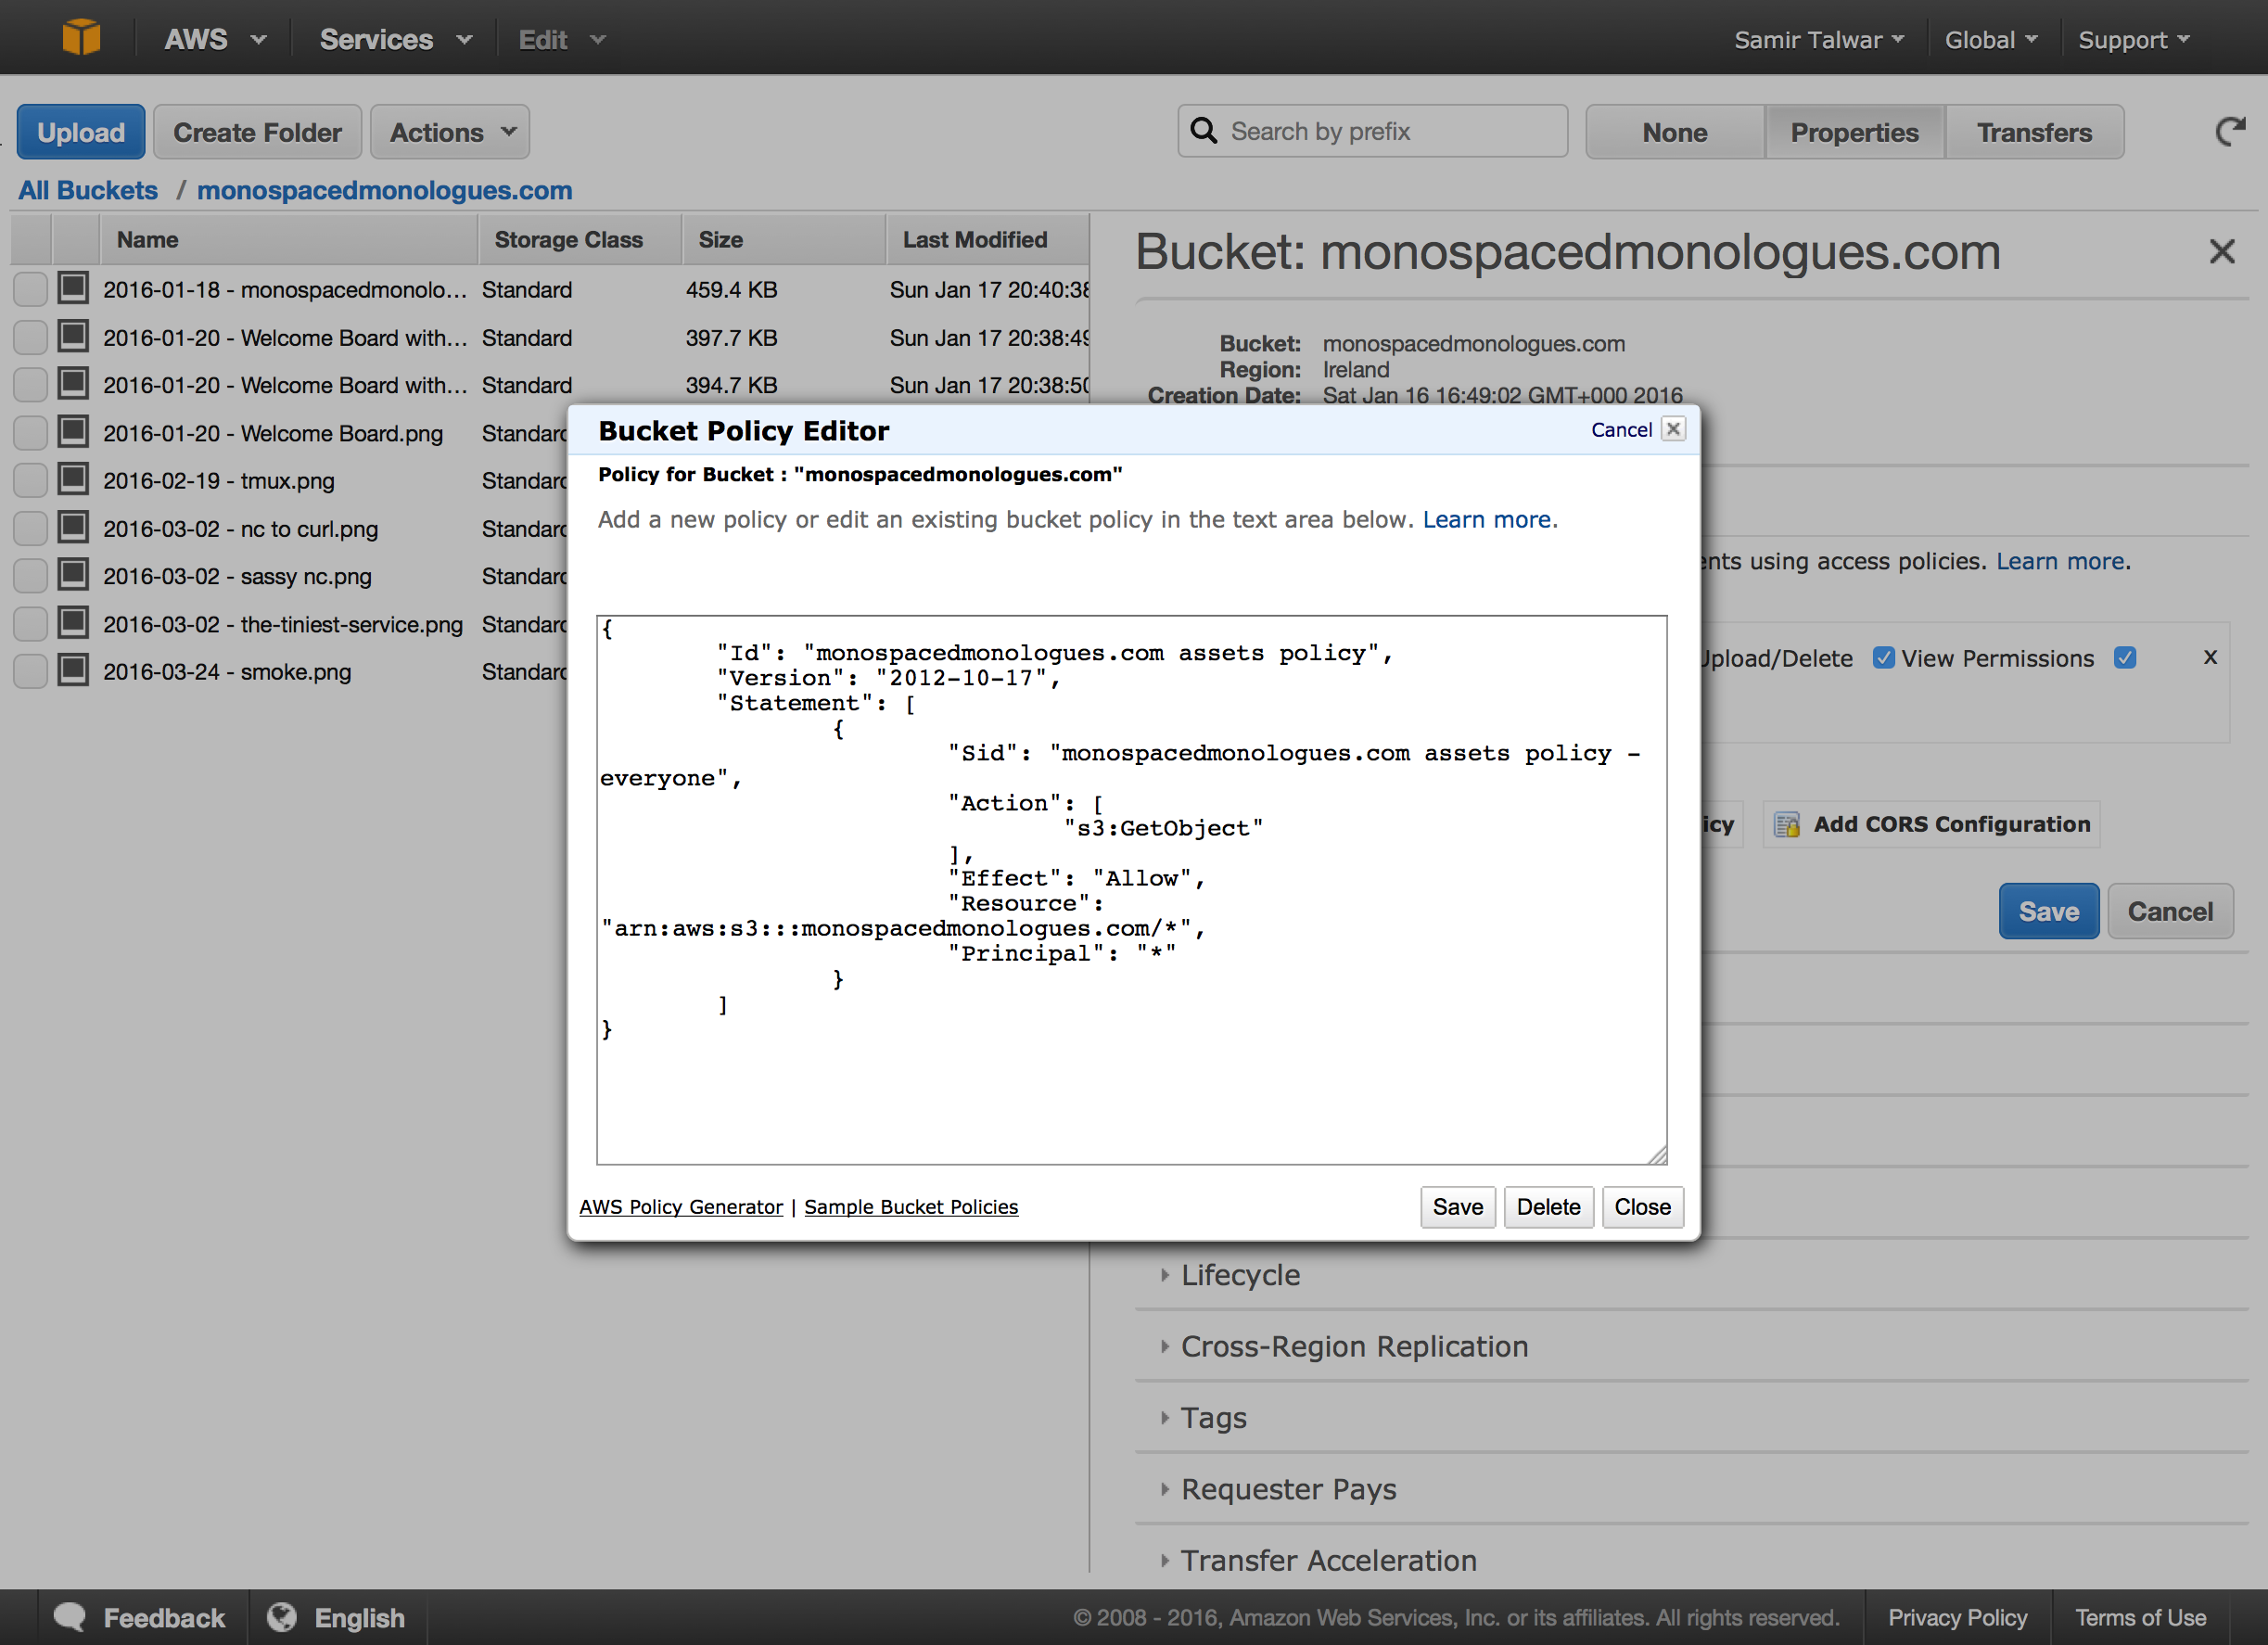
Copy the code you see in the policy generator and Head back to S3. Deselect all files and open the Properties view to check out the bucket's properties. Open up the Permissions section, click Add bucket policy and paste in the policy you generated, then save.
Finally, click on that link again to view your file. It should be rendering nicely now! You can use those links everywhere. Instead of hosting your assets with your code where they take up valuable bandwidth, let someone else do the heavy lifting.
CDNs, because files are big and not your problem
S3 is a great place to put your files, but a bucket still lives in one place. This means that transferring your assets to someone on the other side of the world will still be slow.
A Content Delivery Network, or CDN, solves this problem by storing copies of your files all over the planet in lots of data centres. This means that your files are physically close to your customers no matter where they are, increasing transfer speed and improving their experience. We can set up a CDN to copy the contents of our S3 bucket everywhere we need.
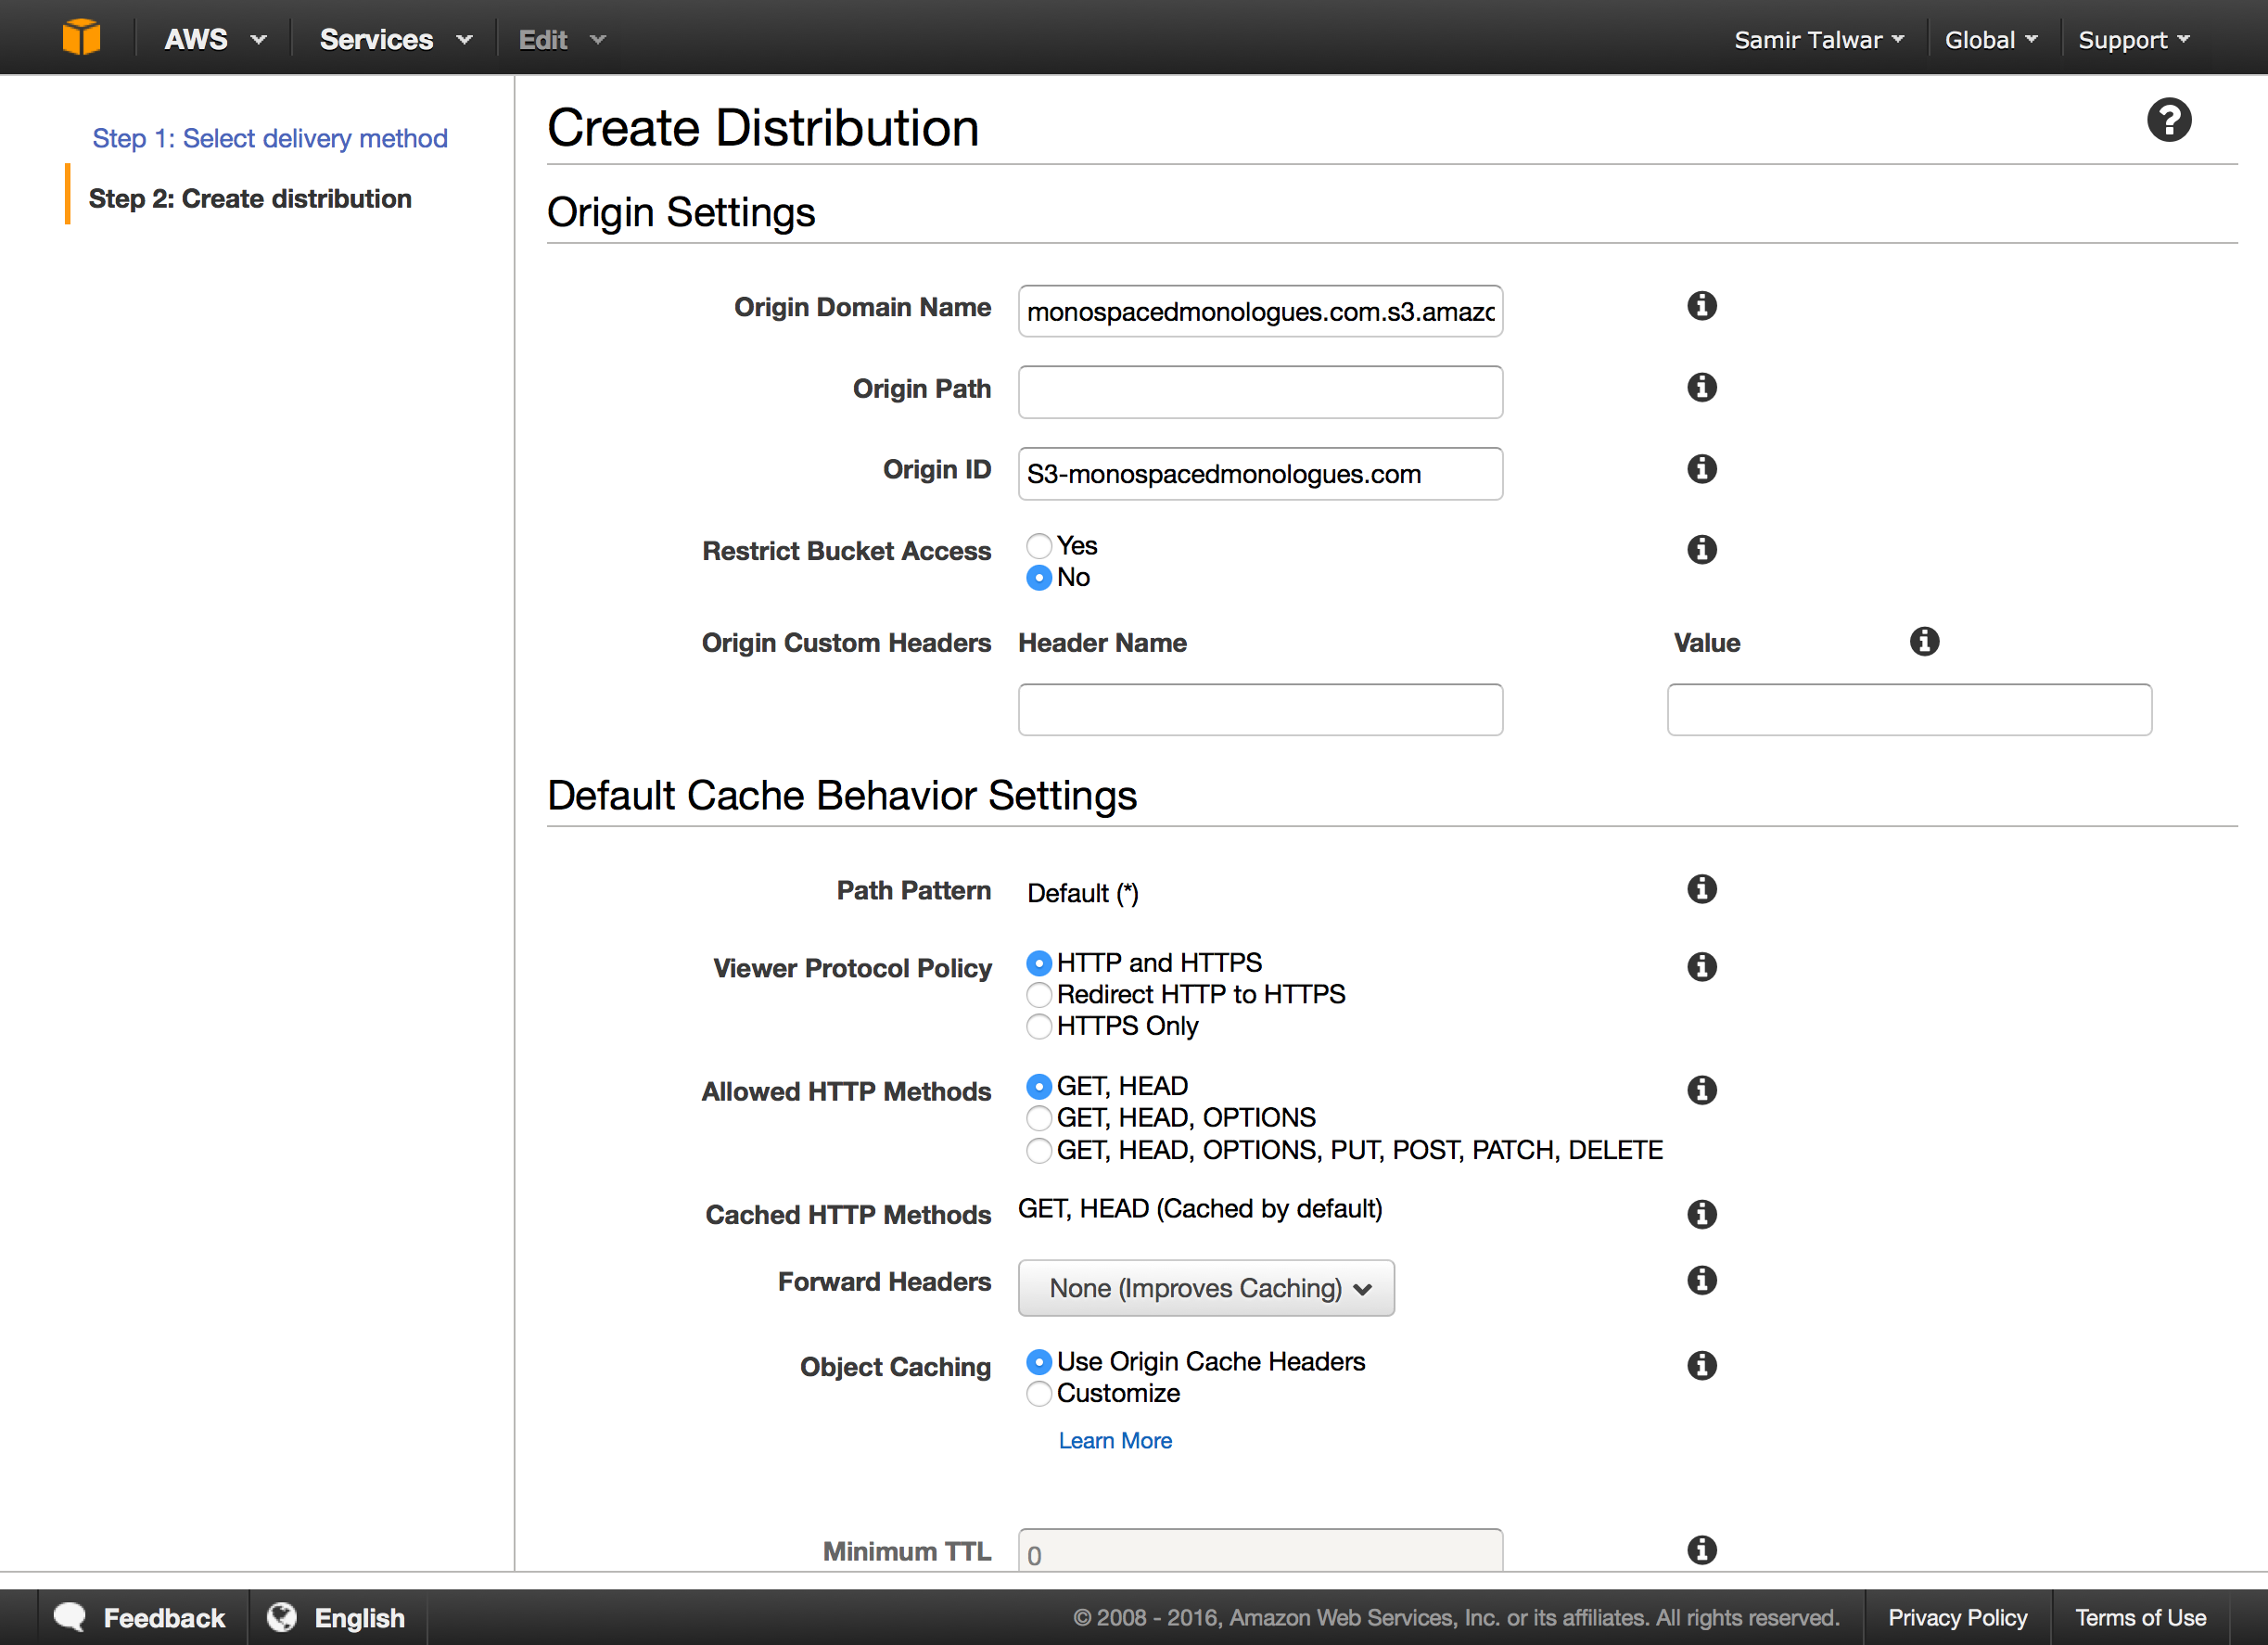
Amazon's CDN service is called CloudFront. Open up the CloudFront home page and click Create Distribution, then select the Web distribution. In the Origin Domain Name, enter your bucket's domain name in the form <bucket>.s3.amazonaws.com (it should auto-complete). Everything else will be filled in for you. Scroll to the bottom and click Create Distribution.
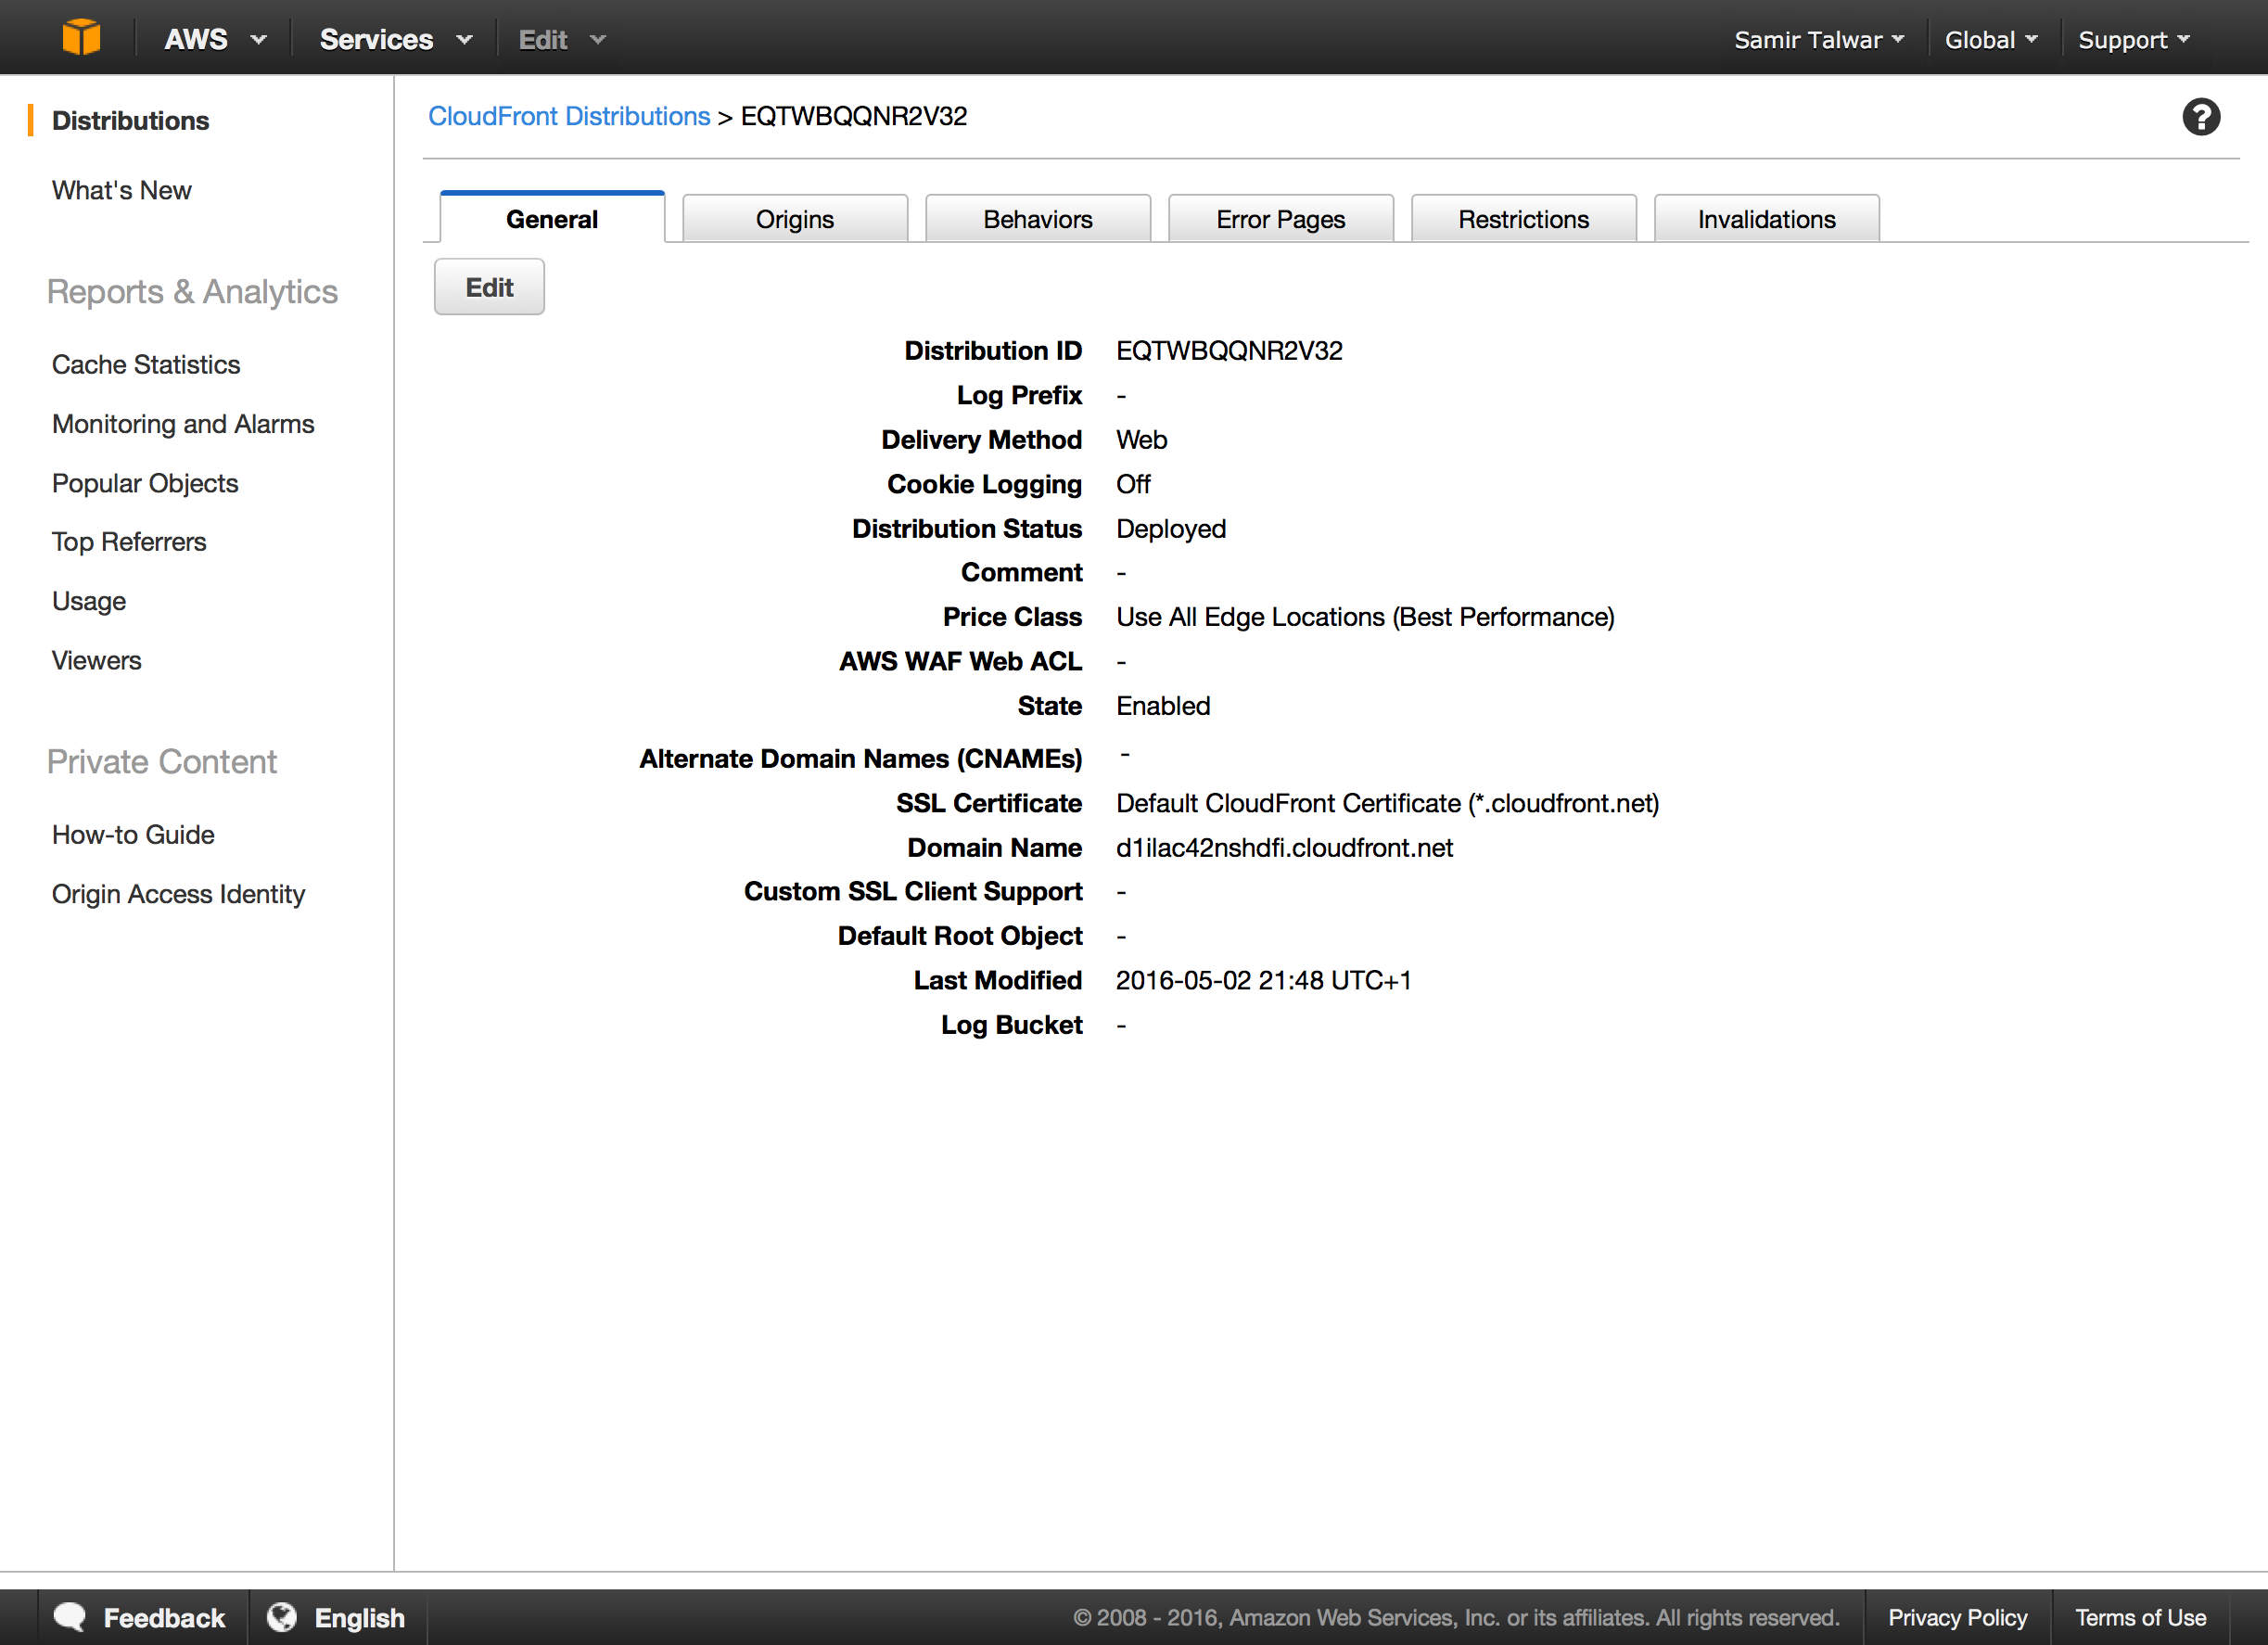
Copying your content to servers all over Amazon's gigantic network will take a while. You'll see a table with a spinner in the Status column. Go make some tea, and hopefully it'll say Deployed instead when you come back.
Now all you need to do is get your distribution's domain name. Click on its ID (which will be a big long string of letters and numbers) to view the distribution details. You'll see a domain name — for my CDN distribution, it's "d1ilac42nshdfi.cloudfront.net". Now all you need to do is replace the bucket's domain name with that new one:
Take a look at one of your files using that domain. It should be exactly the same content, but now it's being delivered from a local CDN server. If you're serving up large files such as videos, your users will get a much better download rate and potentially a more solid connection.
Own your URLs
One last thing. I want to use my own domain for my assets, not one I can barely remember. This, fortunately, is pretty easy. You can do it in three steps.
First of all, pick your domain. A subdomain of your website is probably good enough. I've selected "assets.monospacedmonologues.com" for mine.
Next, you may have noticed that your CloudFront distribution had an empty field named Alternate Domain Names (CNAMEs). Edit the distribution by clicking the Edit button, and add your domain to that field.
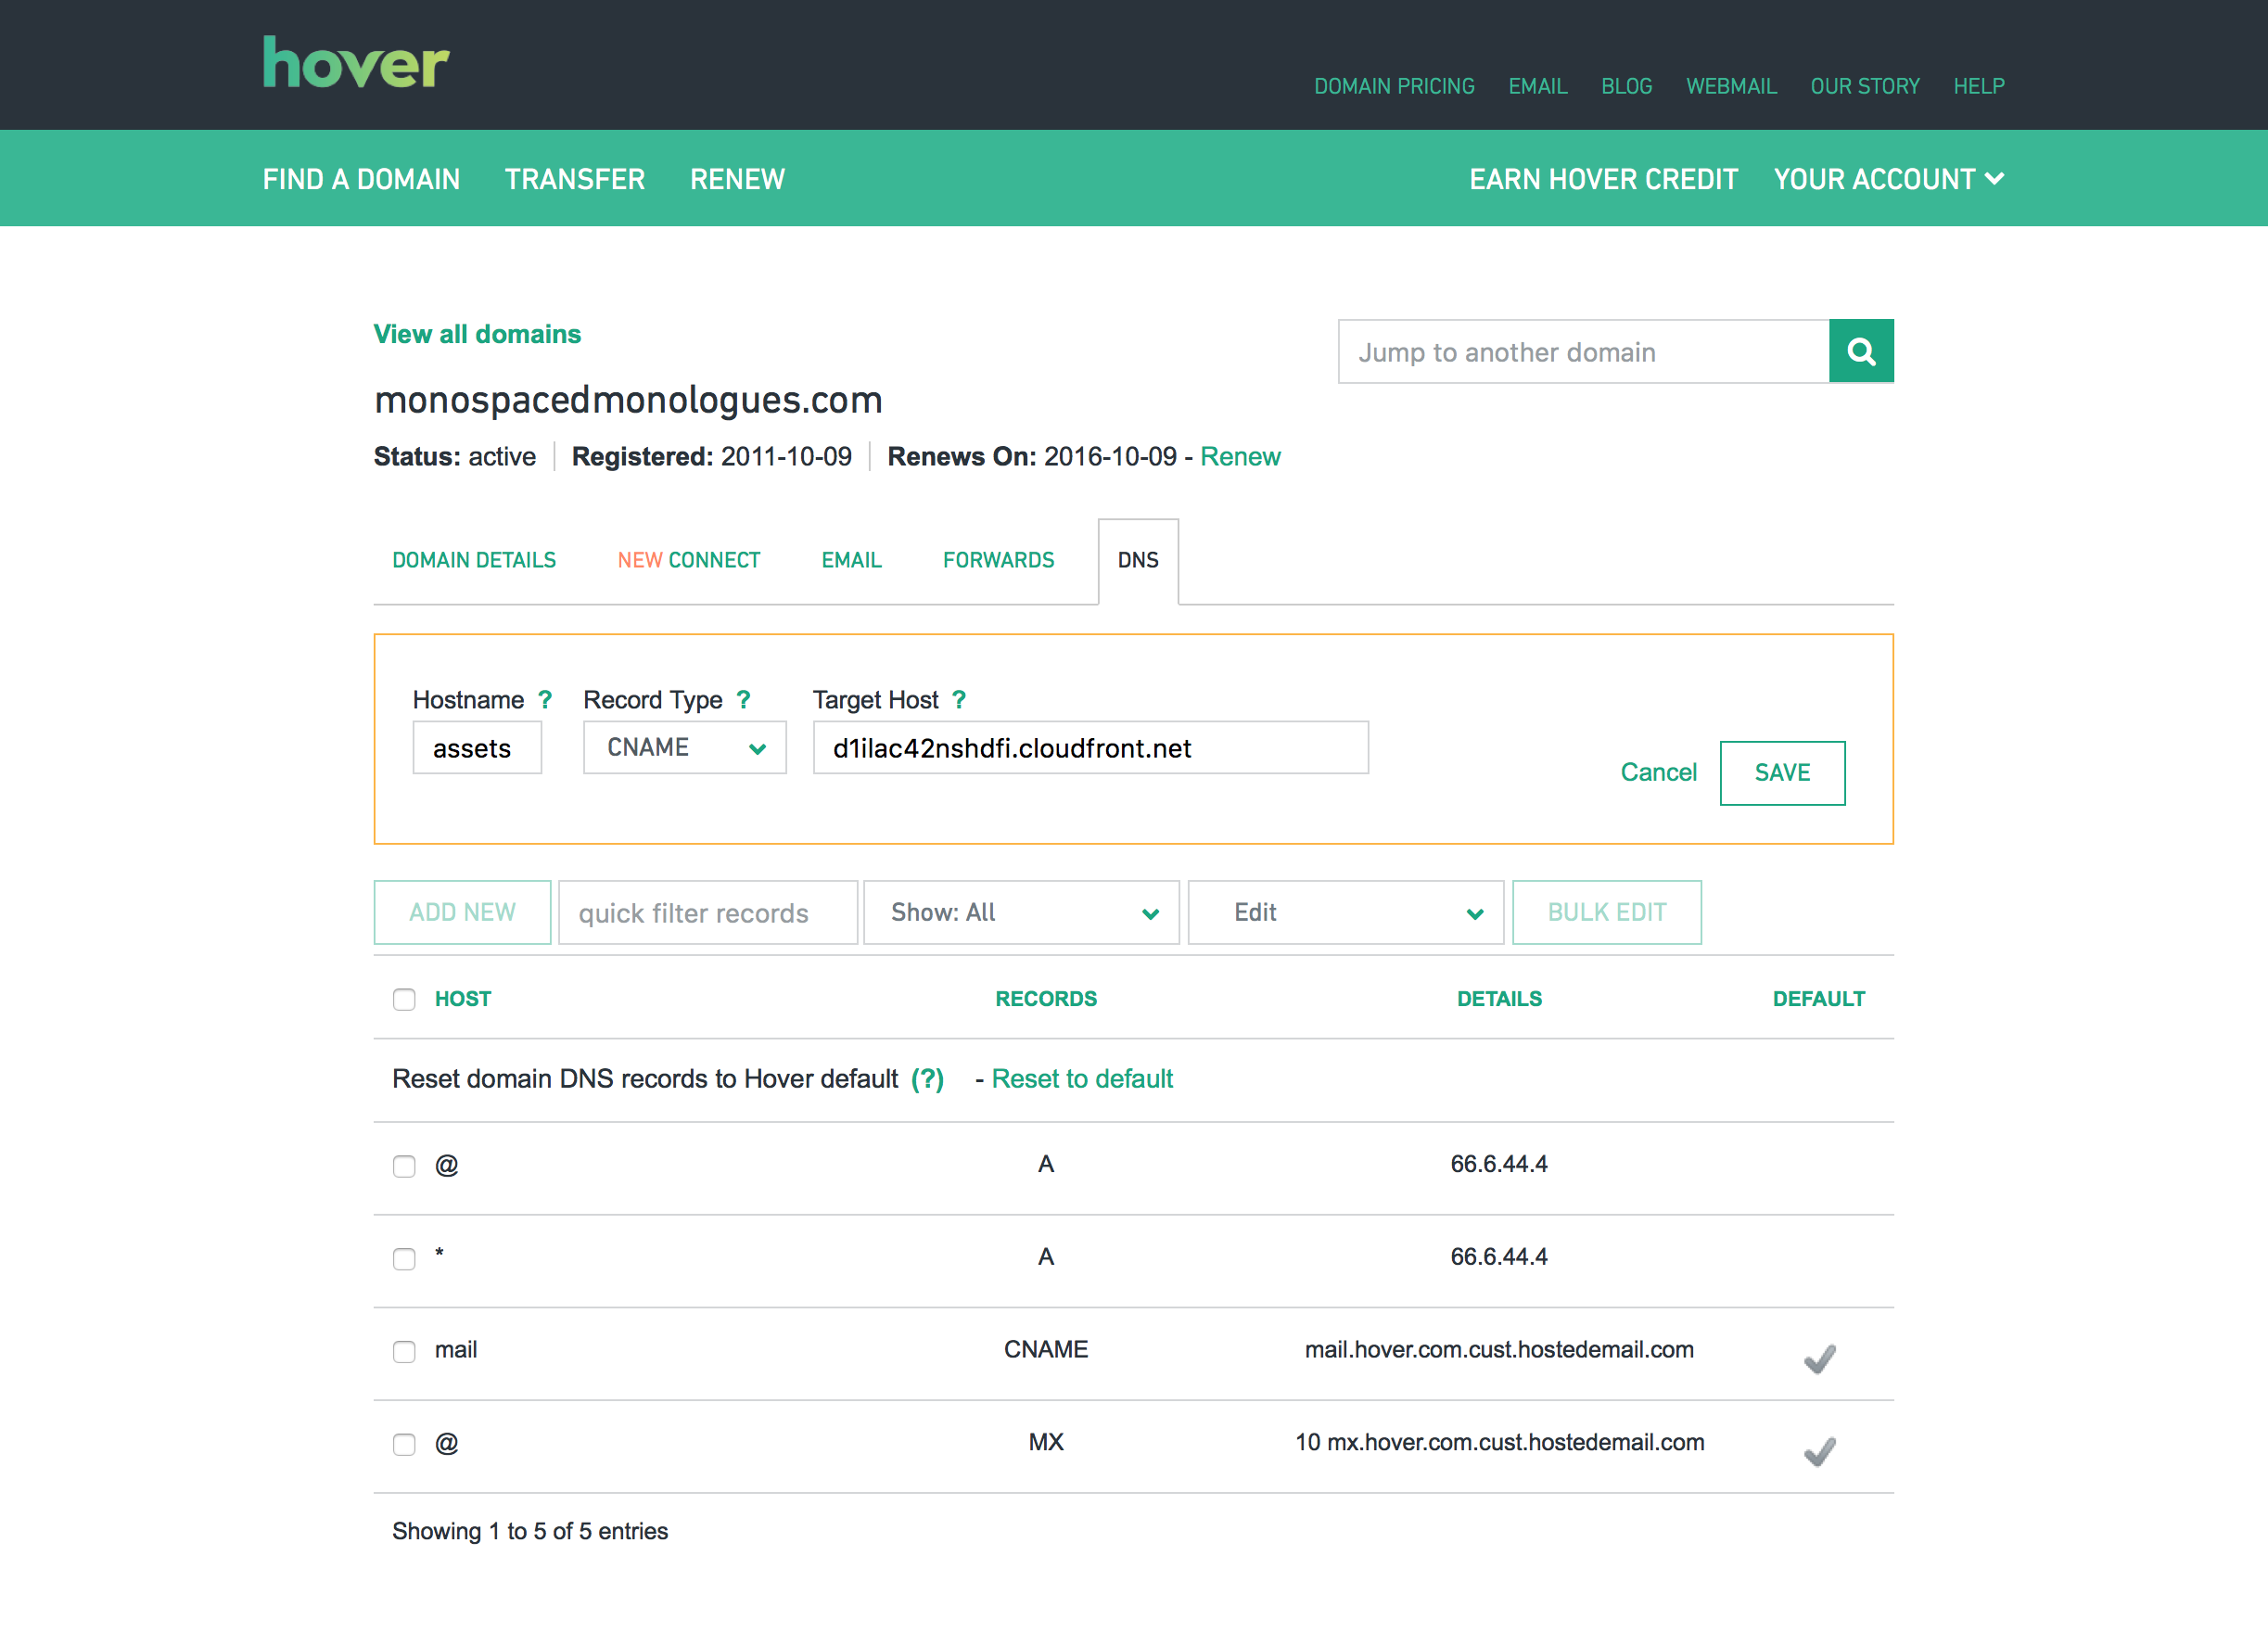
Finally, you'll need to add a DNS record. I use Hover, but your domain provider will be very similar. Simply add a CNAME record with the subdomain name, and provide your distribution domain as the target. In my case, the source hostname is "assets" and the target is "d1ilac42nshdfi.cloudfront.net".
That will probably take a bit of time to propagate. Have another cup of tea, and when you're back, you should be able to access your assets through your own domain.
How much does it cost me?
I get about a thousand visitors to my blog per month. There's not a lot of people viewing the images as I don't use them very often, but even if it were to become a lot popular, I'd still probably fit into S3's free tier and pay nothing at all for storage. After the first 20,000 requests, the Ireland region charges $0.03 (USD) per GB, which means if I become a celebrity and millions of people read my blog, I'll probably be charged $1 per month.
CloudFront is even cheaper. Transferring a terabyte of data costs somewhere between $0.085 (8.5 cents) and $0.250 (25 cents) depending on the region of the server. Unless you're starting a new online streaming business, you're not going to be paying more than a few cents per month.
In the next part, we're going to look at hosting server-side applications for free on Heroku. If you've been itching to get your badass web app online but weren't too sure how to host it without paying a lot of money, we've got you covered.