For our main project in this course, we will use webpacker. So let's start by building on top of the app we created in the previous lesson with webpacker.
Note: We're not going to use the react-rails or react_on_rails gems for our app, so proceed from here with just the webpacker setup from the previous lesson (without the other third-party gems).
Let’s create a new component called Eventlite for our app in app/javascript/packs/Eventlite.js:
Note: We're not going to use the react-rails or react_on_rails gems for our app, so proceed from here with just the webpacker setup from the previous lesson (without the other third-party gems).
Let’s create a new component called Eventlite for our app in app/javascript/packs/Eventlite.js:
import React from 'react'
import ReactDOM from 'react-dom'

const Eventlite = props => (
  <div>Welcome to Eventlite</div>
)

document.addEventListener('DOMContentLoaded', () => {
  ReactDOM.render(
    <Eventlite />,
    document.body.appendChild(document.createElement('div')),
  )
})
We'll keep things simple for now and have just one page where we can create events and list them.
Let’s start by creating a list of events.
We’ll send the events data from our controller to the view and then display it inside the React component.
At the moment, we don’t have a database model for saving event data, so for now, we’ll start by passing in some dummy JSON data.
Inside the index action in events_controller.rb:
class EventsController < ApplicationController
def index
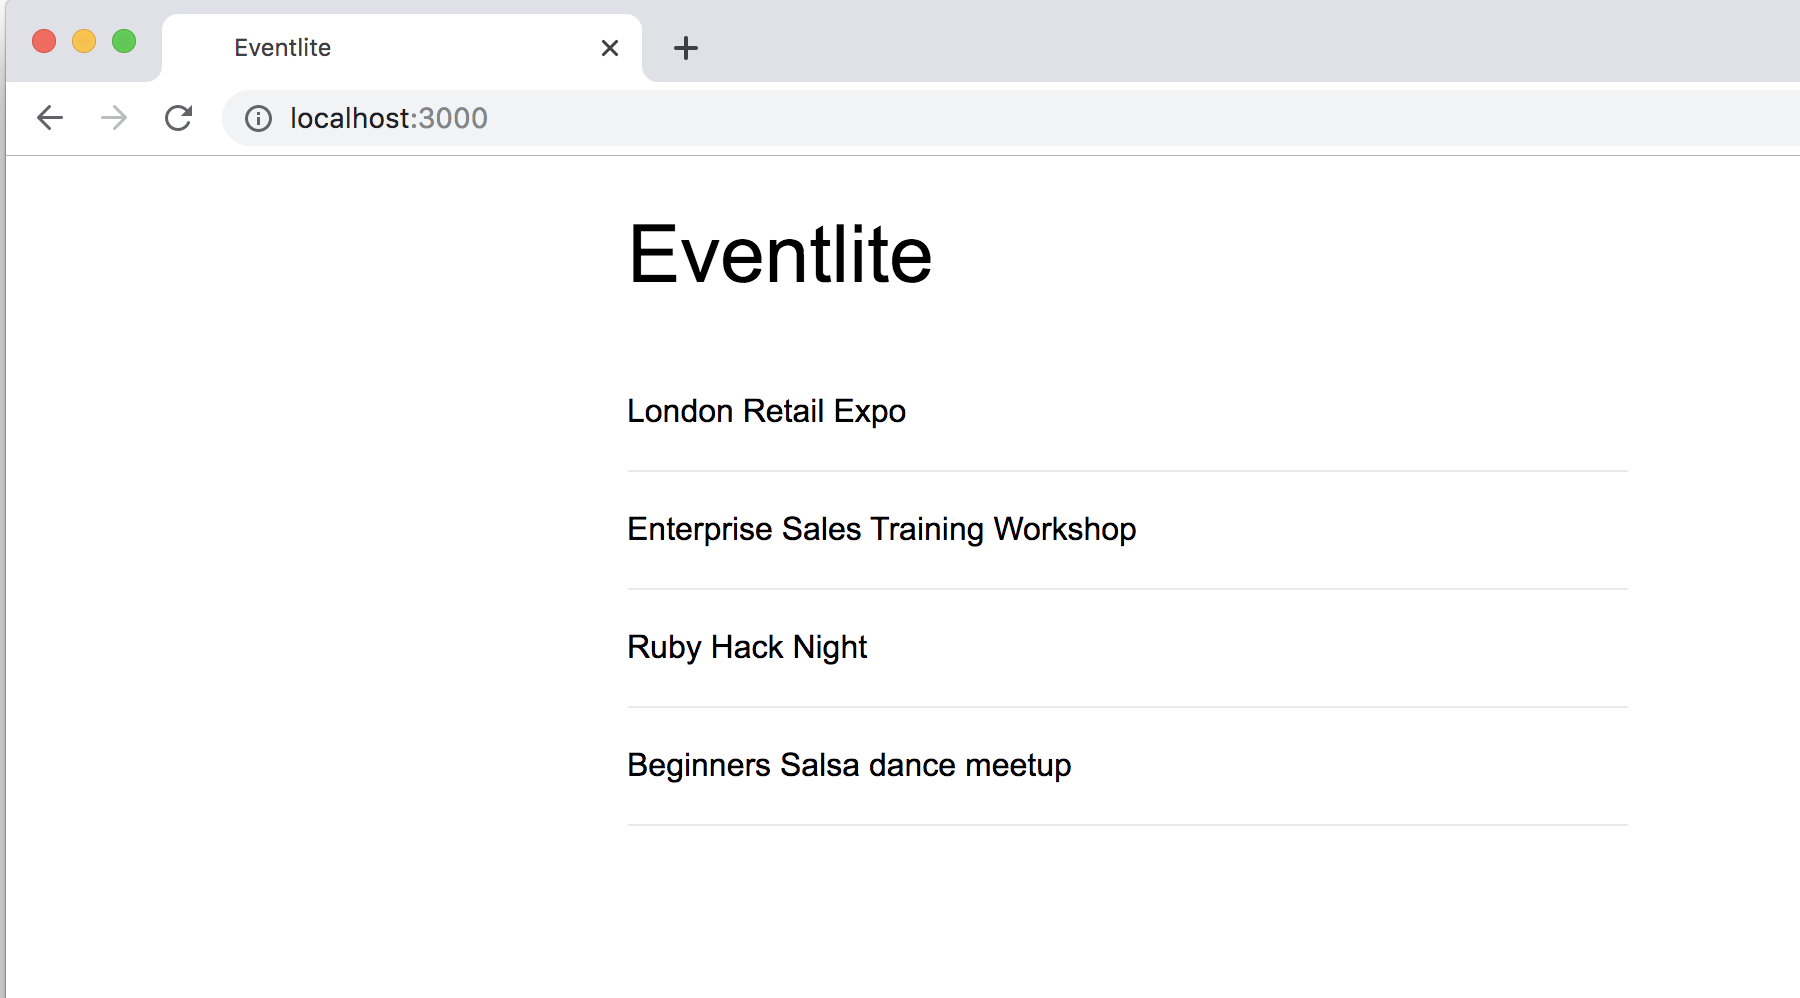
@events = [
{
title: "London Retail Expo",
datetime: "Monday 21 Oct, 2019",
location: "London Excel Centre"
},
{
title: "Enterprise Sales Training Workshop",
datetime: "Tuesday 22 Oct, 2019",
location: "Expert Sales Company Headquarters"
},
{
title: "Ruby Hack Night",
datetime: "Friday 25 Oct, 2019",
location: "Learnetto Headquarters"
},
{
title: "Beginners Salsa dance meetup",
datetime: "Saturday 26 Oct, 2019",
location: "Bar Salsa"
}
]
end
endWe can access this data from our index view with a content_tag.
In events/index.html.erb:
<h1 class="logo">Eventlite</h1>

<%= javascript_pack_tag 'Eventlite' %>

<%= content_tag :div,
  id: "events_data",
  data: @events.to_json do %>
<% end %>
Now we need to update the Eventlite component to use this data.
First, we parse the JSON and pass it as a prop called events to the Eventlite component:
In Eventlite.js:
document.addEventListener('DOMContentLoaded', () => {
  const node = document.getElementById('events_data')
  const data = JSON.parse(node.getAttribute('data'))
  ReactDOM.render(
    <Eventlite events={data} />,
    document.body.appendChild(document.createElement('div')),
  )
})
Now that the component has the events data as a prop, we can loop through the events to display each event’s information.
Let’s start by displaying the titles for all events in a simple list.
In Eventlite.js:
const Eventlite = props => (
  <div>
    {props.events.map(function(event){
      return(
        <div className="event">{event.title}</div>
      )
    })}
  </div>
)
Add some CSS to style the page and events:
application.css:
body {
  width: 500px;
  margin: auto;
  font-family: Arial;
  color: #333333;
}

h1.logo {
  font-weight: 400;
  font-size: 40px;
}
events.scss:
.event {
  padding: 20px 0;
  border-bottom: solid 1px #EAEAEA;
}
Refresh the web page to see the result:
So that's the basic setup of our app done. Next, we'll look at how we are going to structure all the components and build further.